

In today's fast-paced business landscape, staying ahead of the competition requires efficient and effective solutions. According to Microsoft’s Work Trend Index, nearly 70% of employee report that they don’t have sufficient time in the day to focus on “work”, with more time being spent Communicating than Creating.
Microsoft 365 Copilot is designed, with Microsoft’s cloud trust platform at its core, to allow for employees to both be more productive, reduce the time spent searching for information, performing mundane tasks, and other low-value activities.
In Part 1 of this 2-part blog series, we looked at Microsoft Defender Vulnerability Management (MDVM) core capabilities that are included with Microsoft Defender for Endpoint P2. In this post, we will focus on the “Add-on” capabilities which include:
- Security baseline assessments
- Browser extensions assessment
- Digital certificate assessment
- Network share analysis
- Block vulnerable applications
You can find a breakdown of licensing requirements here: Compare Microsoft Defender Vulnerability Management offerings
Regardless of your current licensing, everyone can get their hands on a 120-day trial to evaluate the full product. This post will focus on additional capabilities included with the add-on and standalone versions of the solution.
- If you don't have Defender for Endpoint Plan 1 or Plan 2, or Microsoft 365 E3, sign up to try the Defender Vulnerability Management Standalone trial.
- If you already have Defender for Endpoint Plan 2, sign up to try the Defender Vulnerability Management Add-on trial.
First, let’s look at security baseline assessments. Microsoft Defender Vulnerability Management leverages Center for Internet Security (CIS) and Security Technical implementation Guides (STIG) benchmarks for Windows 10 and above operating systems. These benchmarks can be customized to create security baselines that fit your organization's requirements. These baselines can be deployed to all or a subset of devices, or all devices, to assess compliance with the security baseline. Here is how to get started.
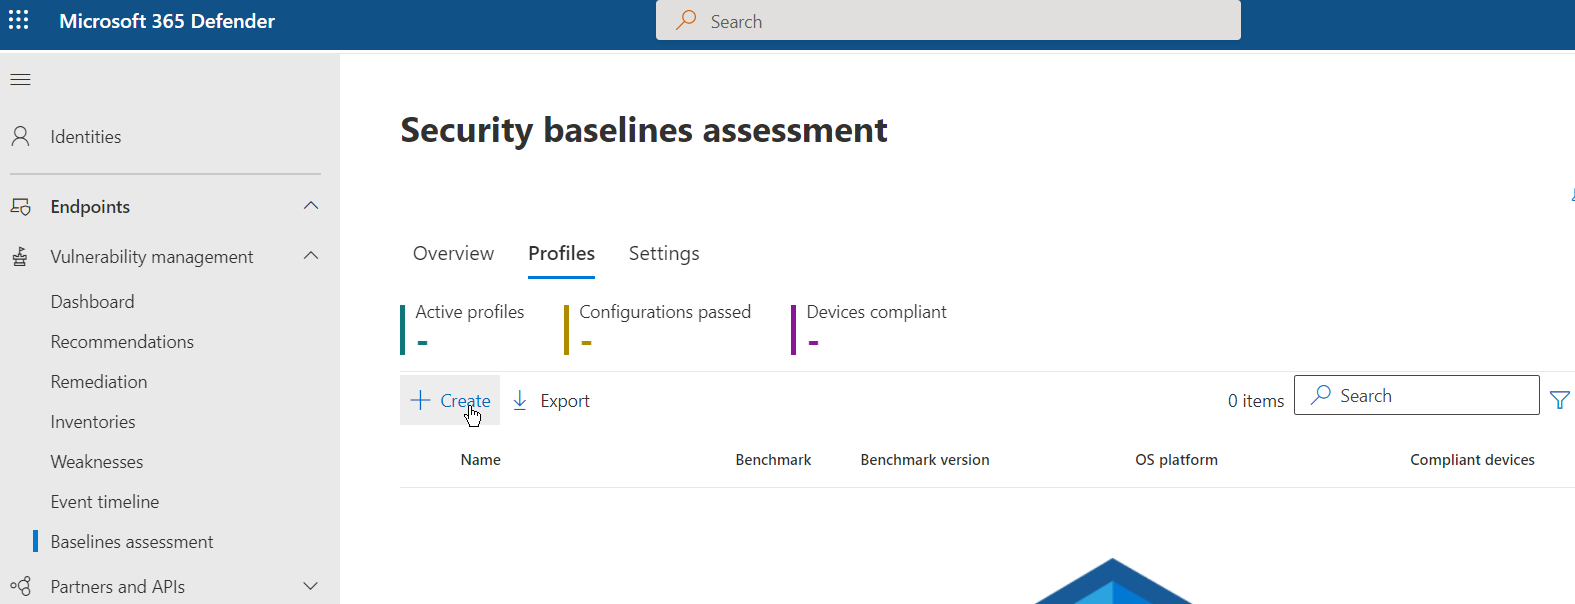
Navigate to the security portal under “Vulnerability Management” and select “Security Baselines.” Choose the “Profiles” tab and then select “Create” to create a new security baseline.
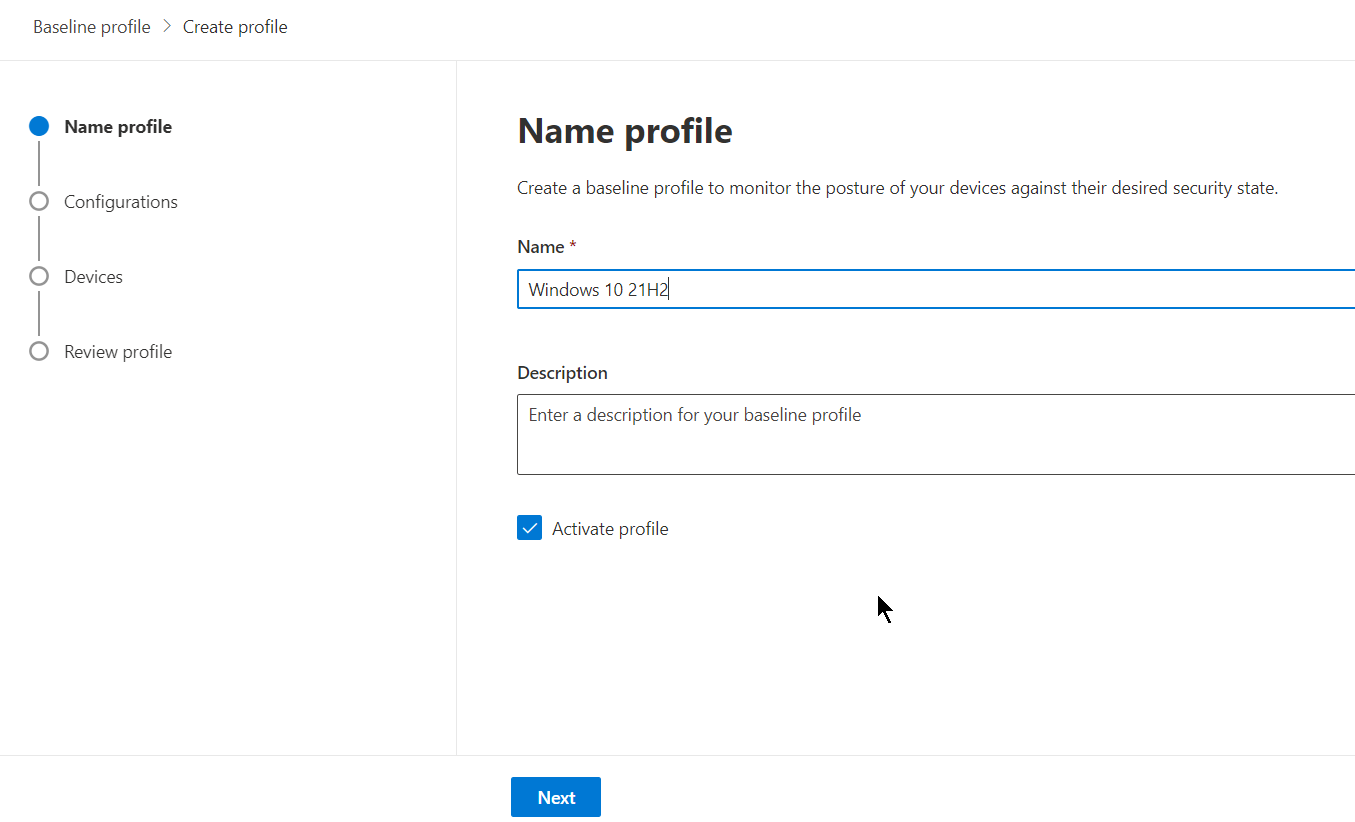
Provide a name and optional description. You can decide at this time to activate the profile or leave it in an inactive state. In this example, the profile will be activated upon creation.
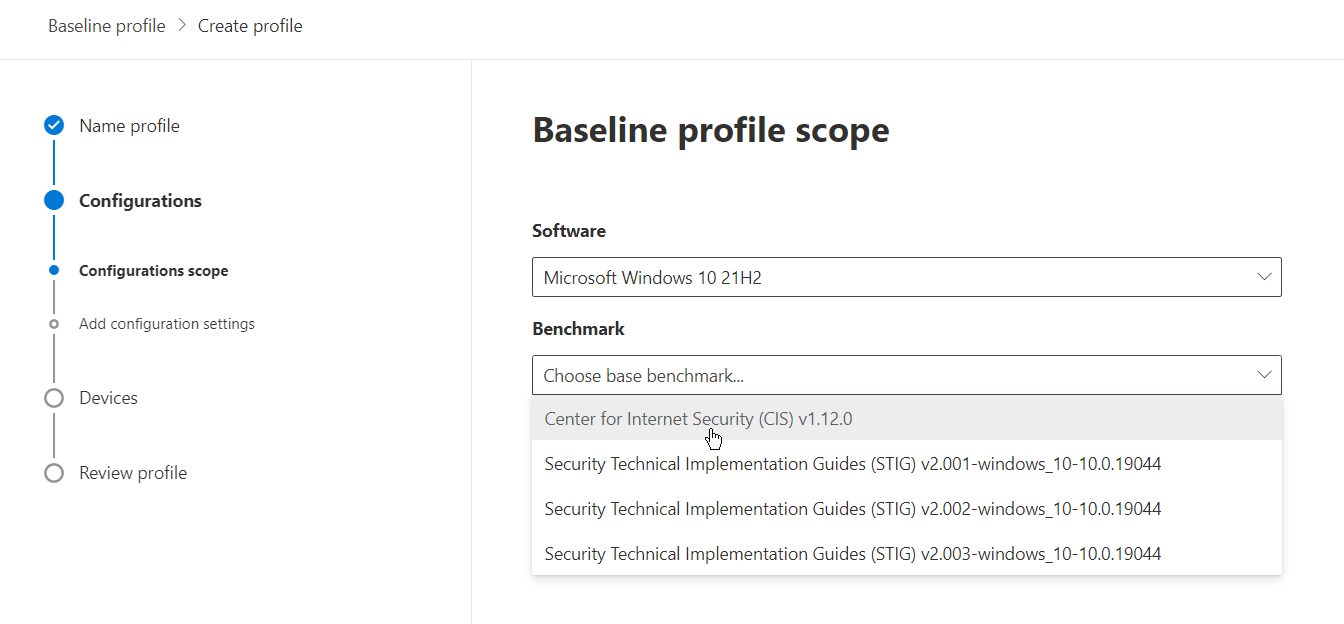
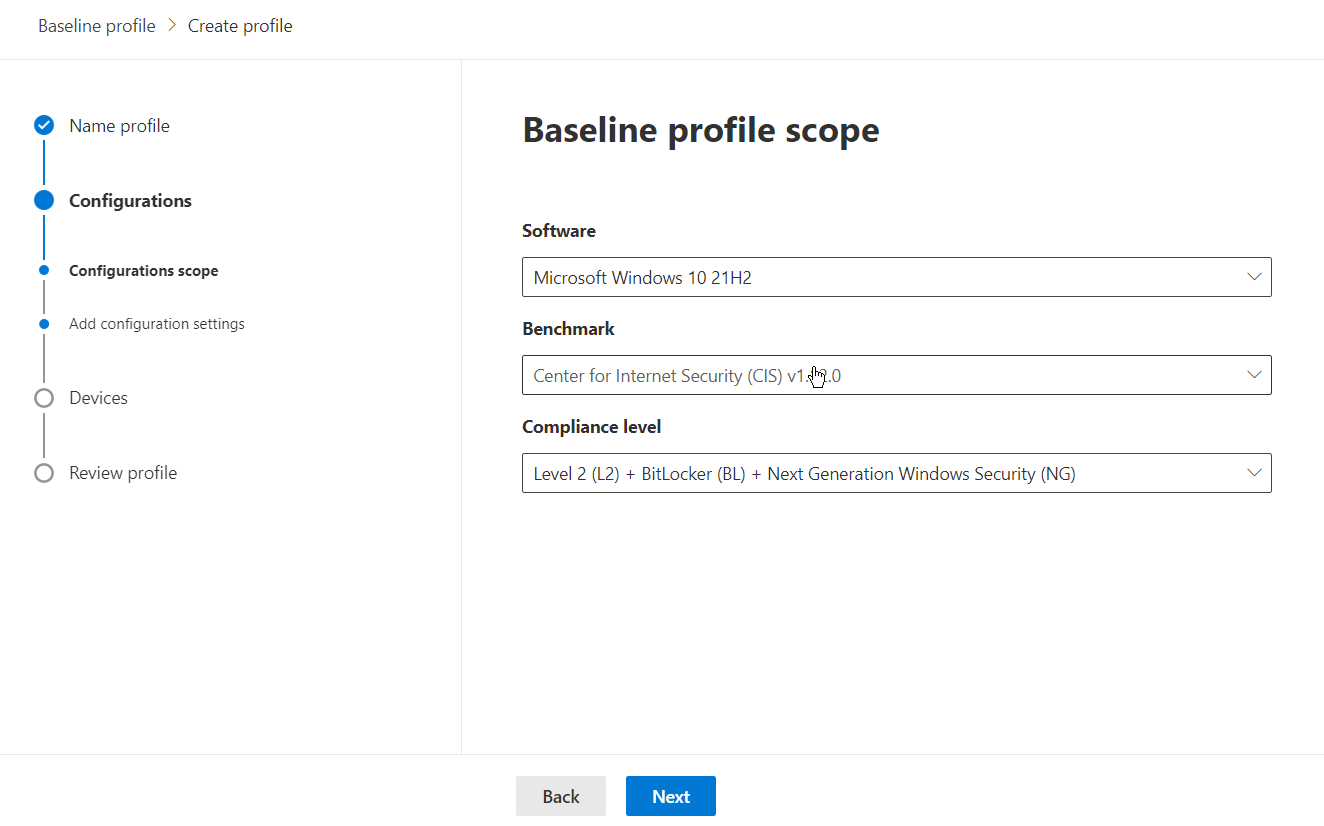
Choose your software and desired base benchmark. For this example, we will choose Windows 10 21H2 and the associated CIS benchmark.
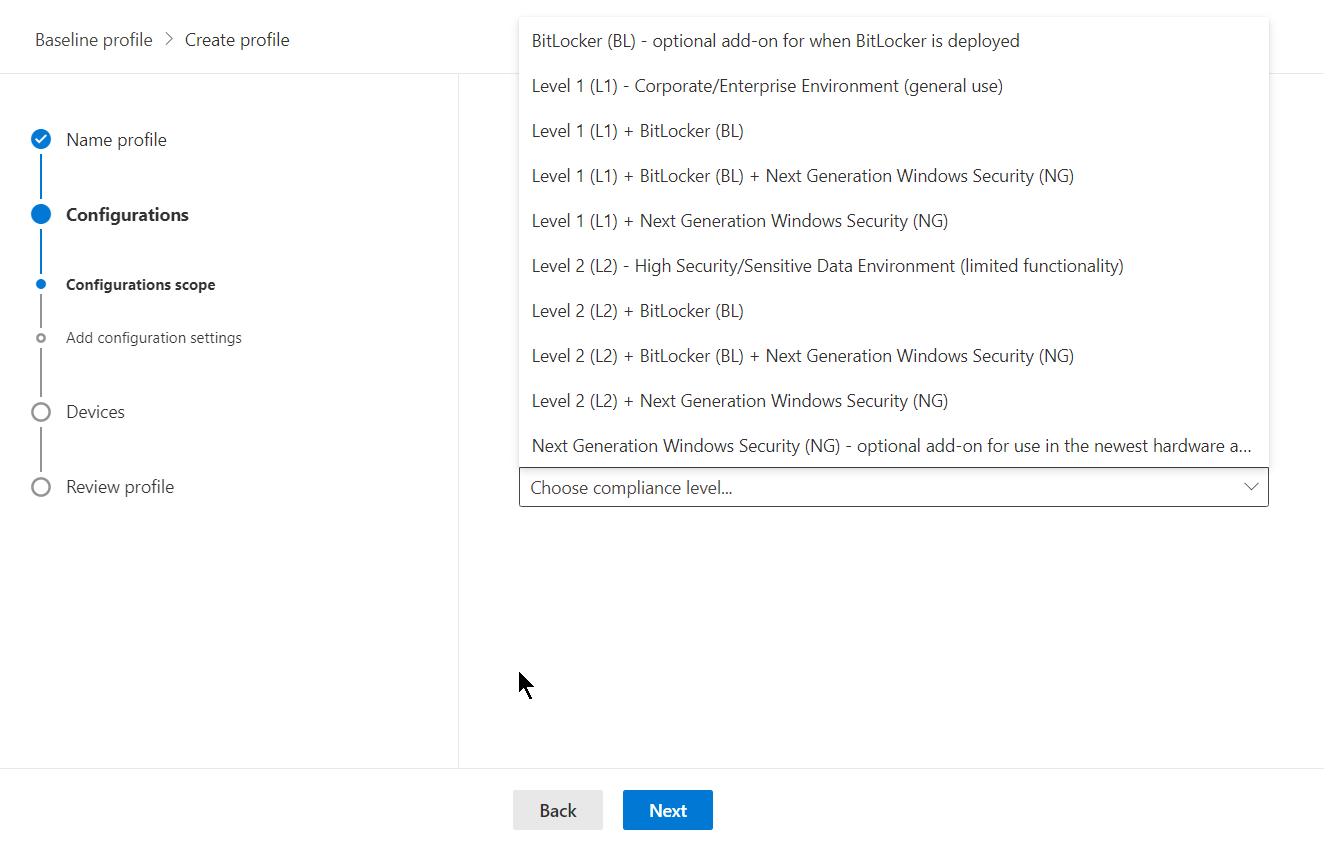
Then choose your compliance level. In this example, we will choose “Level 2 (L2) + BitLocker + Next Generation Windows Security (NG)” which maps to advanced E5/A5 capabilities, BitLocker, and NextGen Windows Security.
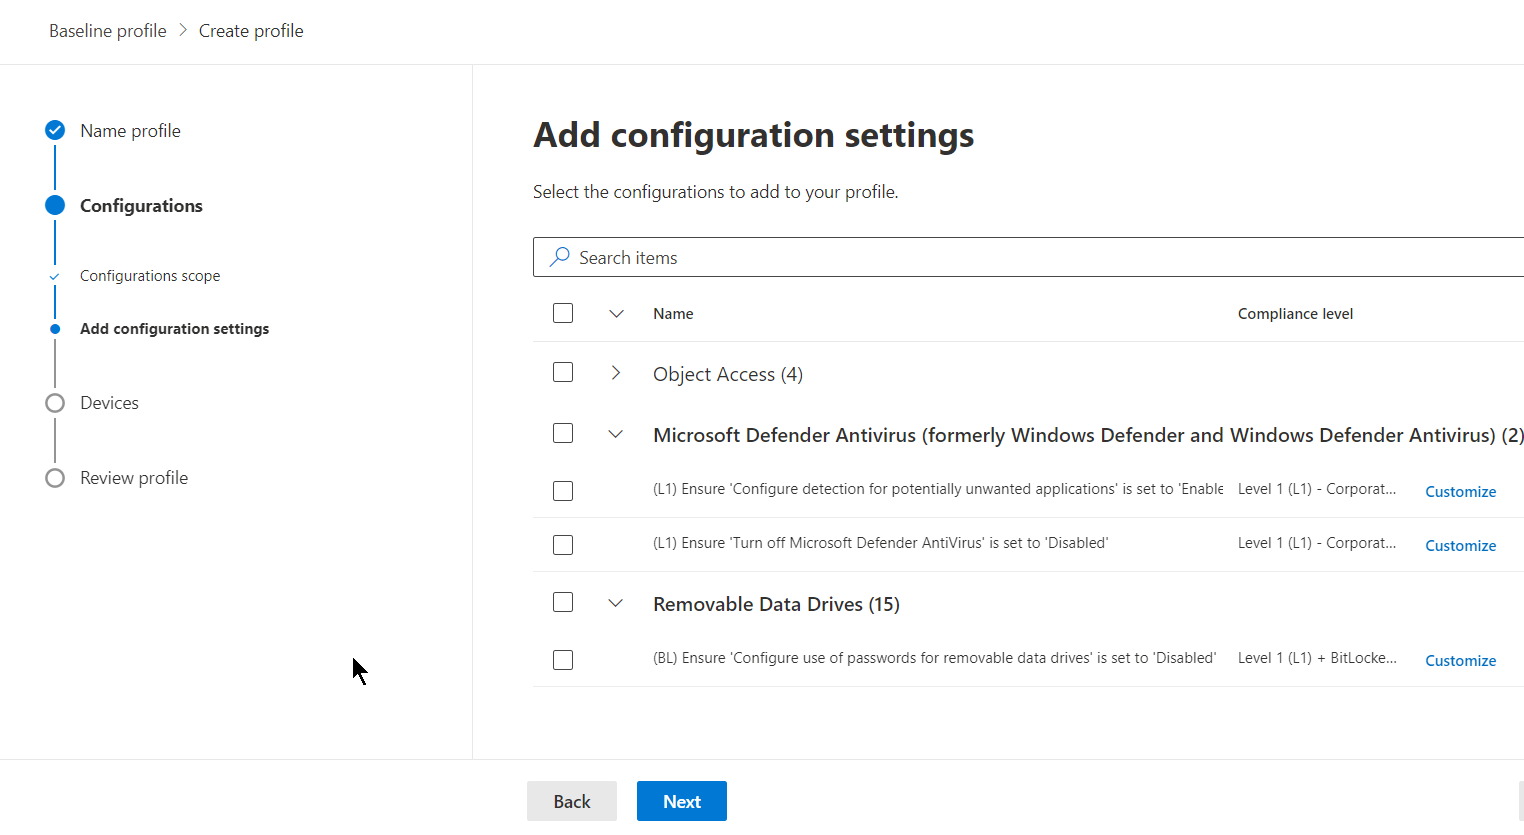
At this point, you can choose what configuration settings make sense for your organization. Some features you may not be using or leveraging a 3rd party to fill those gaps.
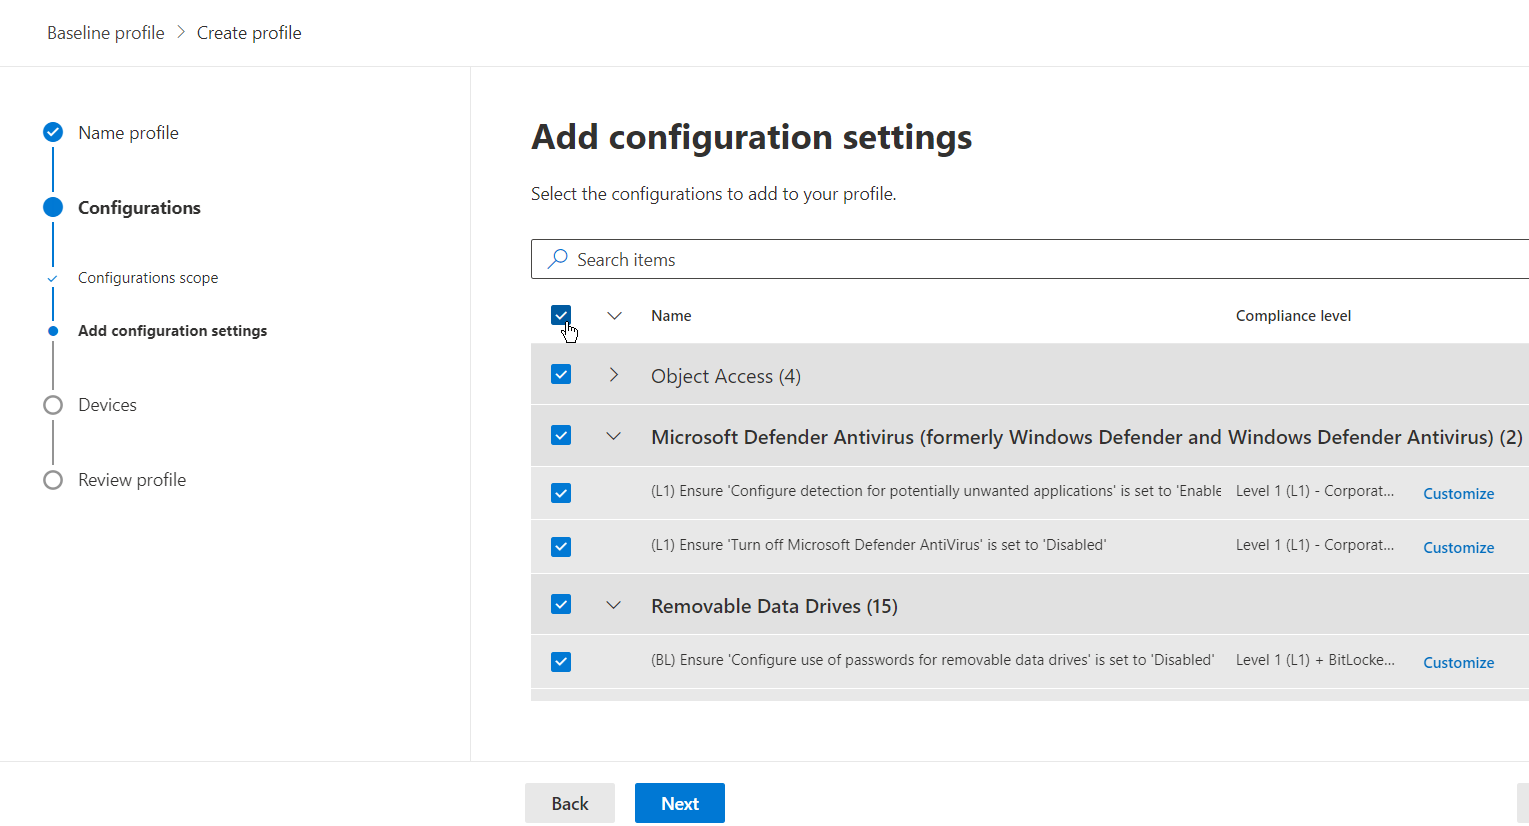
For the example, I will select all configurations for this security baseline profile.
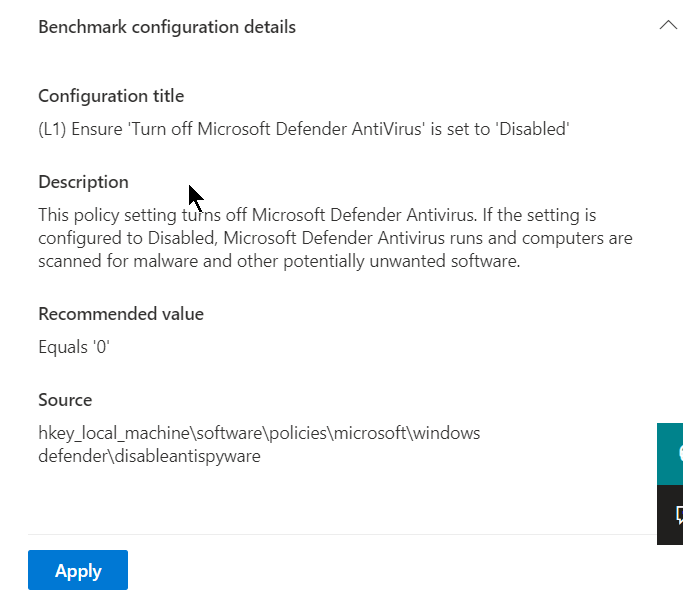
If you look at an individual setting, you can see details for the configuration settings.
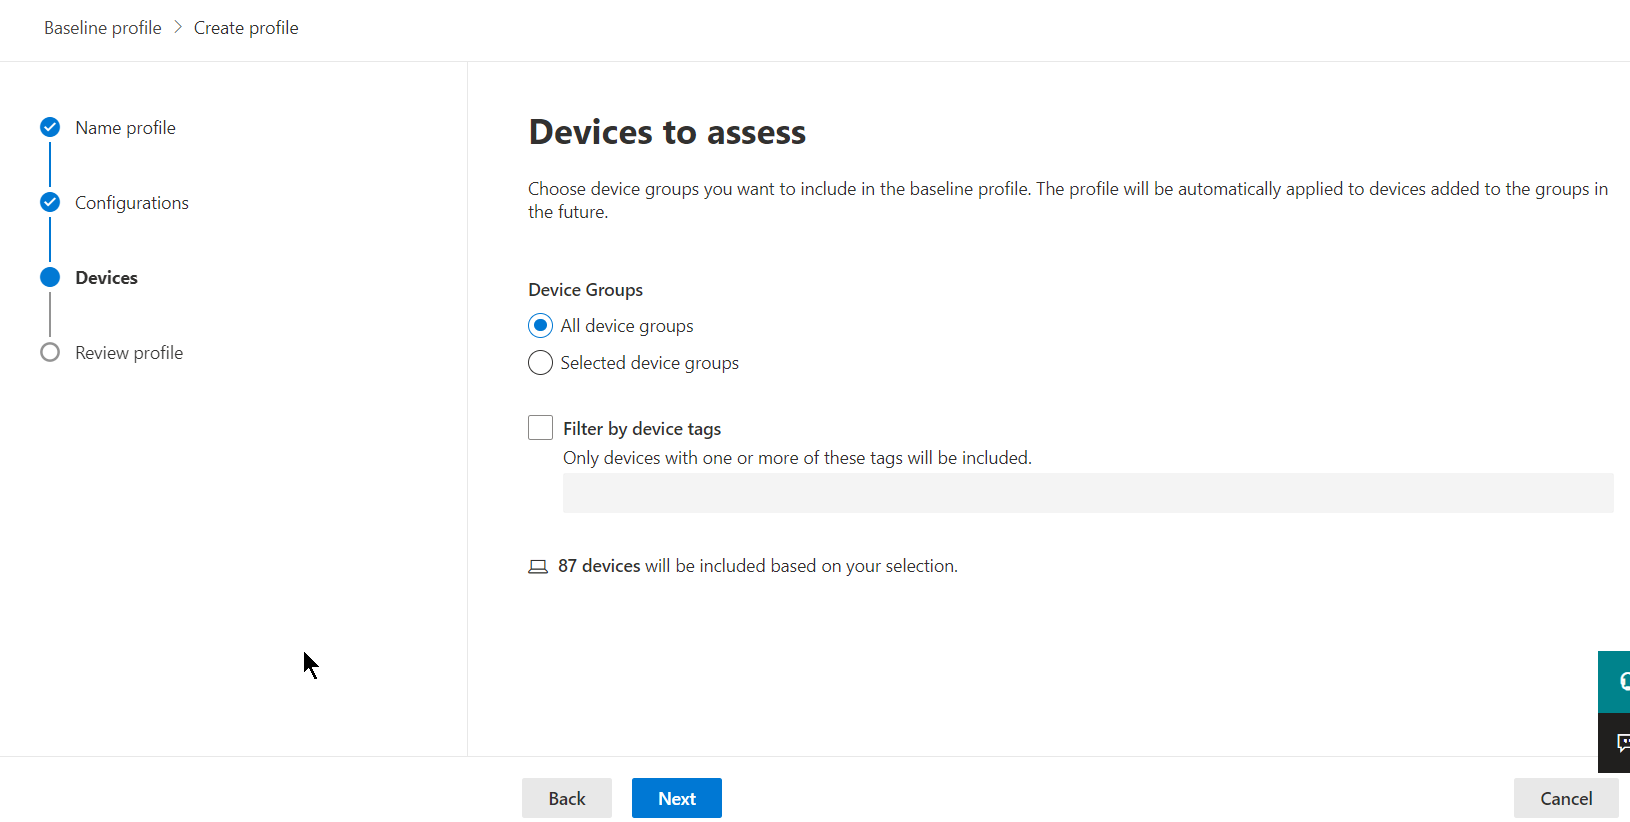
Once configuration settings have been selected, continue with the profile creation wizard by selecting “next.” On the next page, you can choose which device groups to assess against the configuration baseline. After your selection, continue the wizard by selecting “next.”
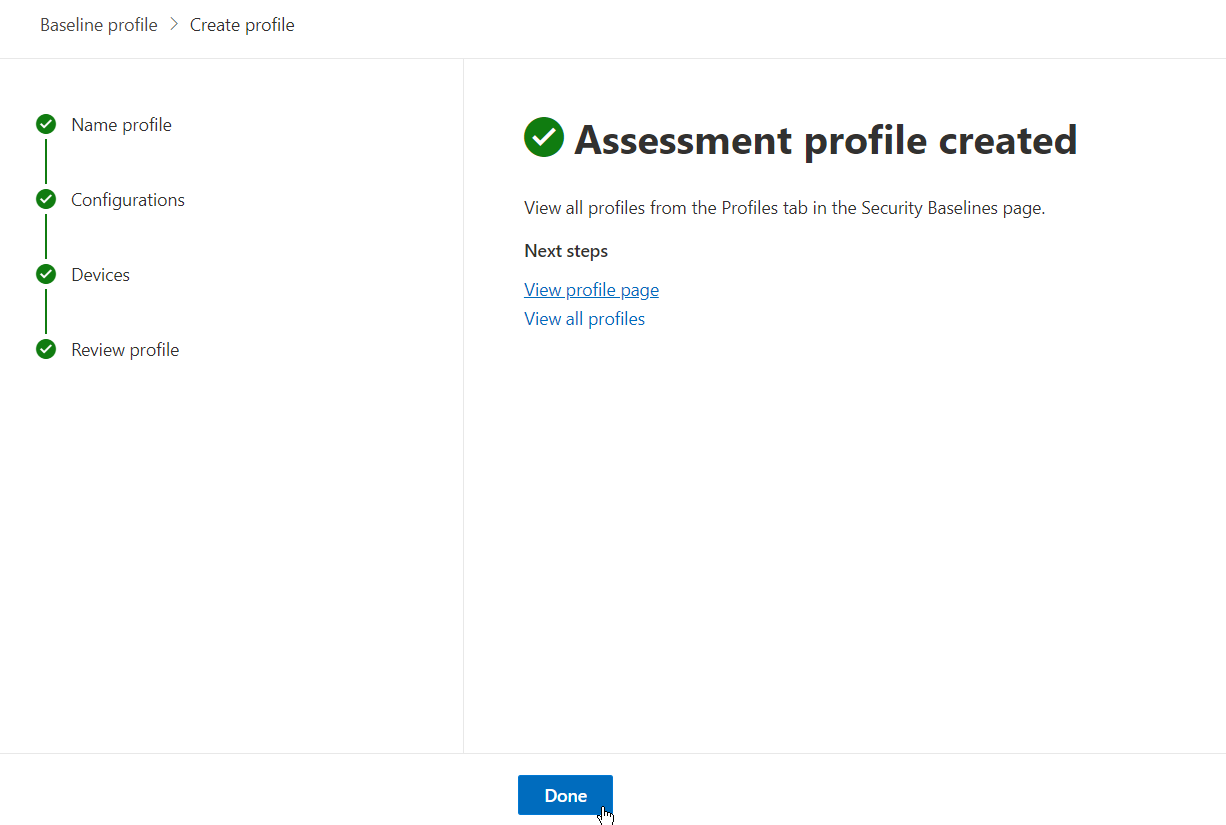
Review your baseline assessment profile and select “done” once you are satisfied with the configuration.
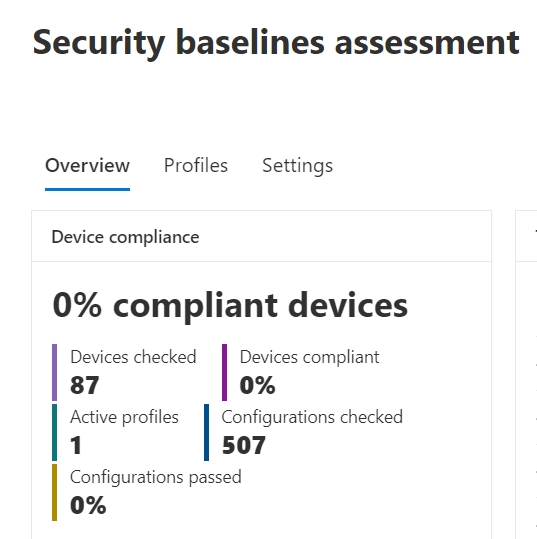
Navigating back to the “Overview” tab under “Baseline Assessment,” you will now see some stats regarding your baseline assessment(s).
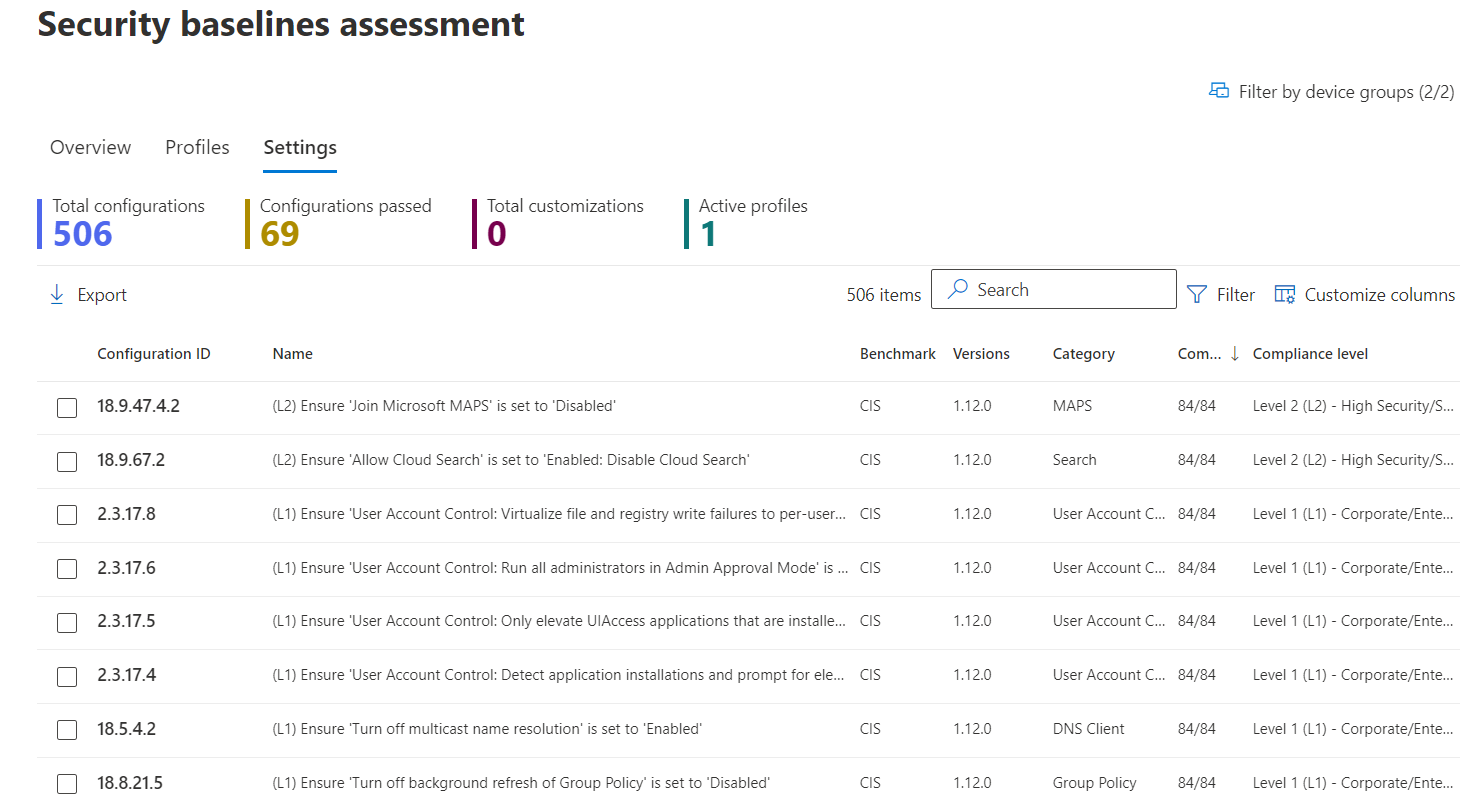
Hopping over to the “Settings” tab, you can see all configuration settings and their current compliance status.
Select any configuration setting to get details for the configuration requirements and information on device compliance in your organization.
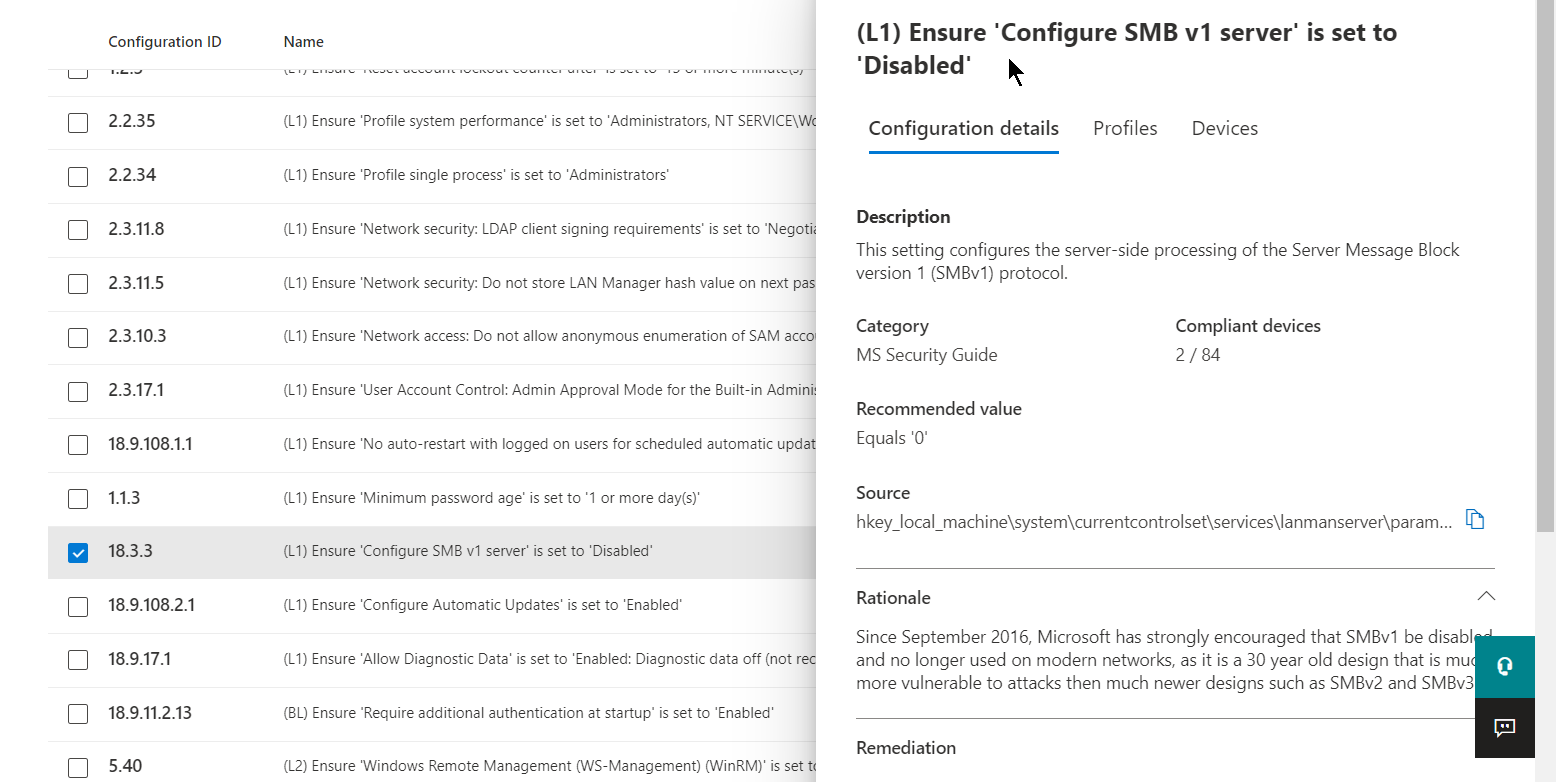
As you can see, performing baseline assessments can help guide an organization to a more mature endpoint security posture by leveraging CIS and STIG benchmarks. All information is in one place and provides guidance on configuration requirements.
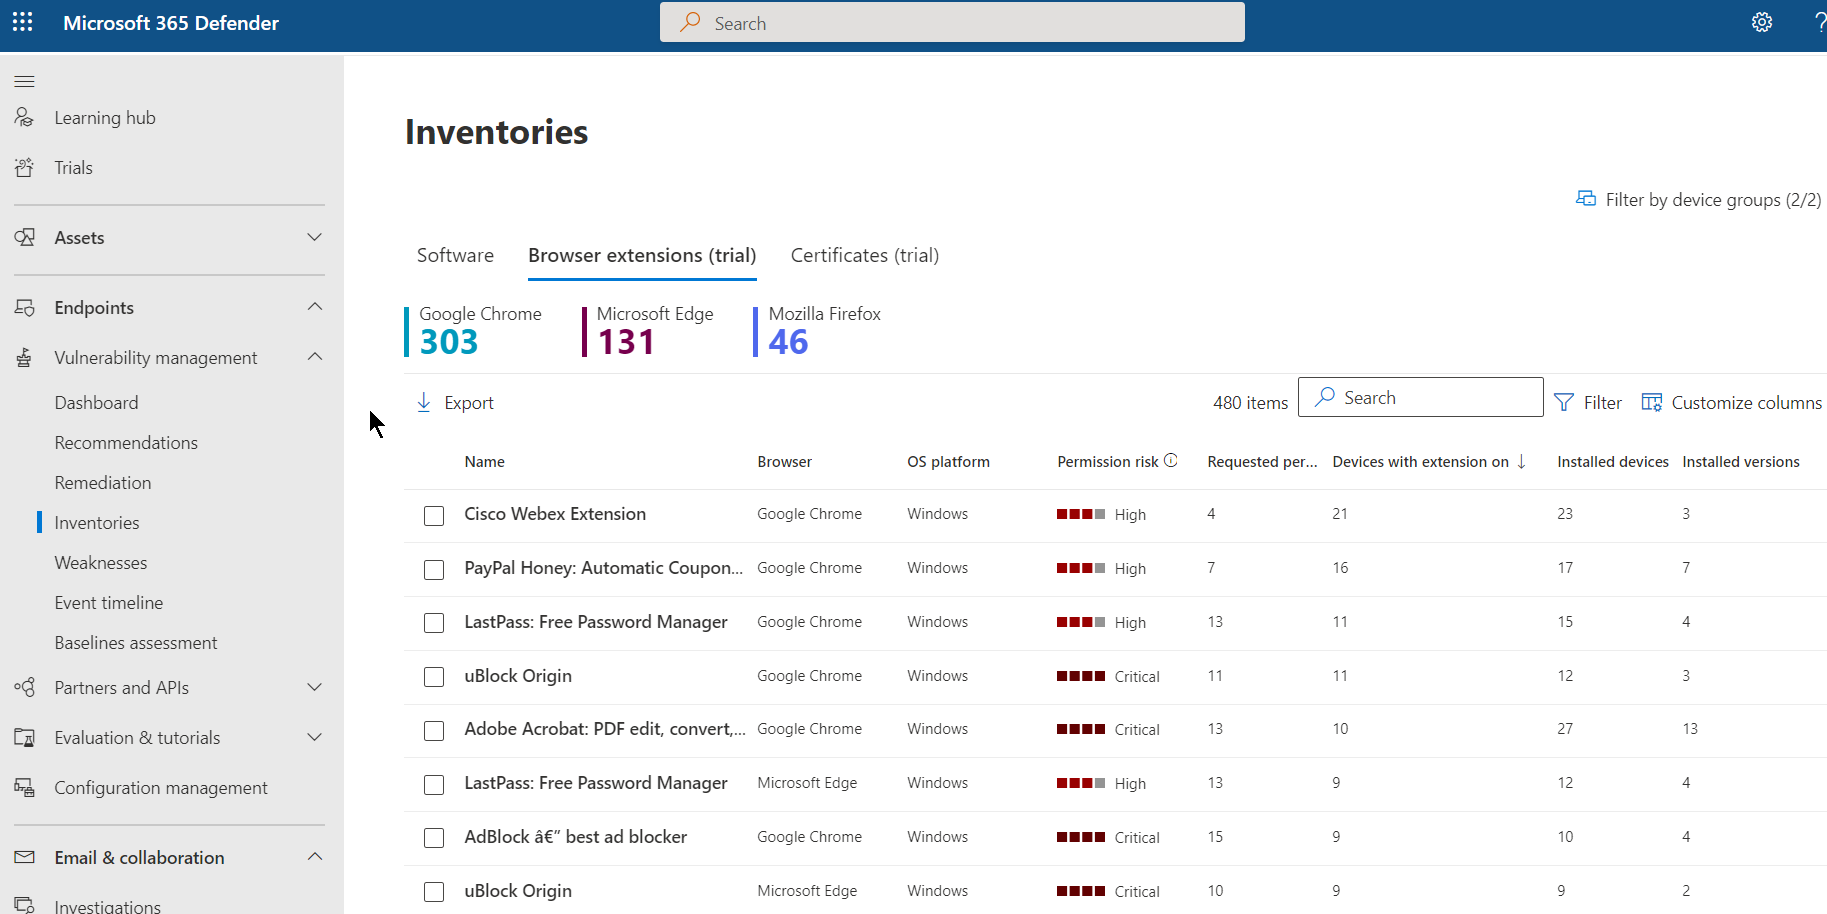
Next, let’s review how MDVM can help provide visibility around vulnerable browser extensions for Microsoft Edge, Google Chrome, and Mozilla Firefox. Navigate to the “Browser extensions” page under the “inventories” pane to see devices on which the extensions are installed and enabled. Here you can see permission risks for the extension to assist with decisions when determining what browser extensions are allowed to run in the organization. This can assist with identifying risky extensions and with planning for the deployment or restriction of extensions.
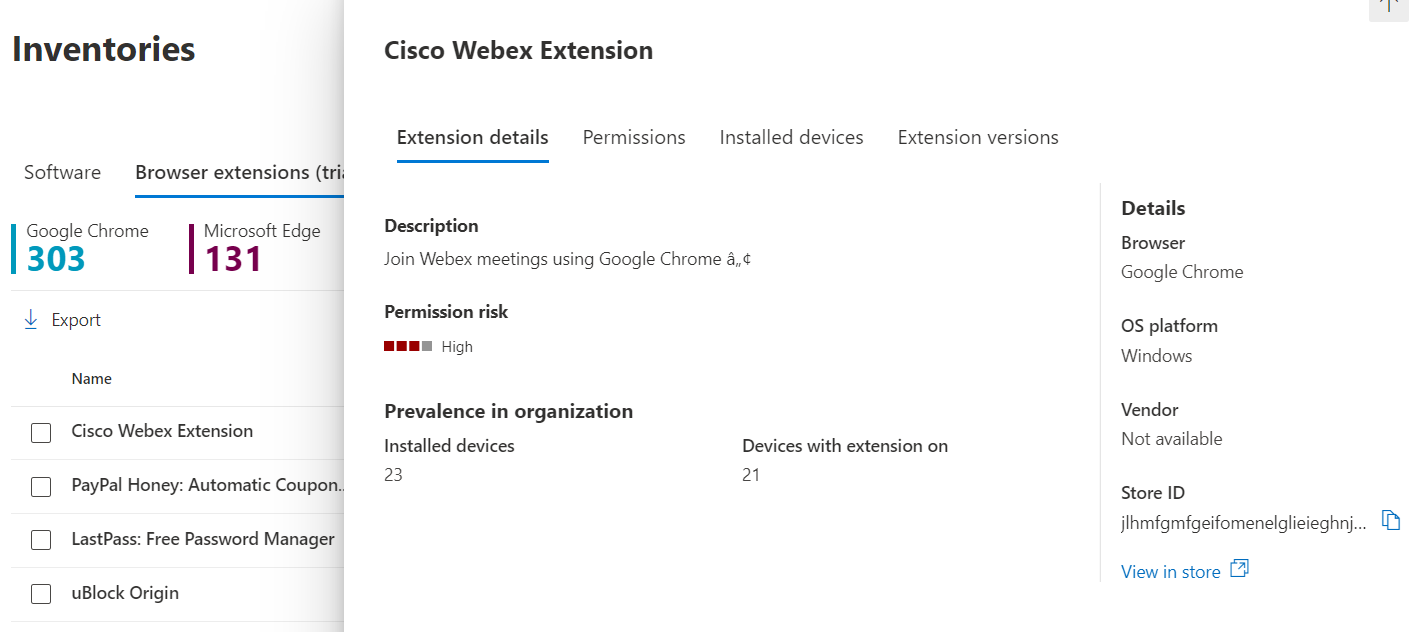
Select a browser extension to open a flyout pane where you can learn more about the extension.
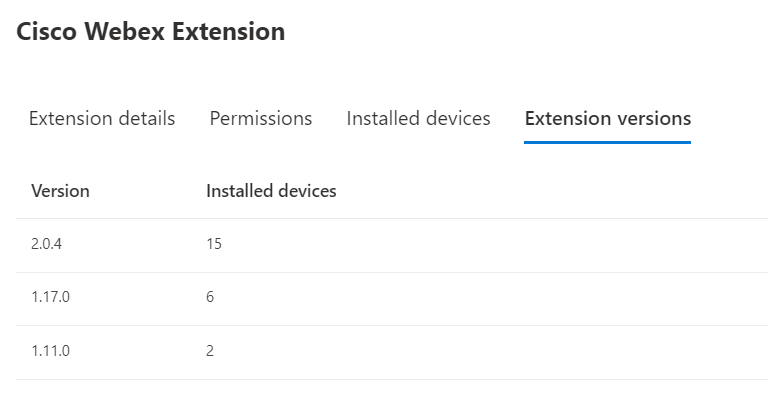
Try selecting the “Extension versions” tab to see the versions installed in your organization.
Next up, let’s stay under the “Inventories” pane and navigate to the “Certificates” tab to enlighten us on expired or misconfigured certificates that could leave your organization vulnerable. On this page, you can view a list of certificates installed for the entire endpoint estate in a central location. Selecting any of these certificates will provide full certificate details, issuing details, and device installation status.
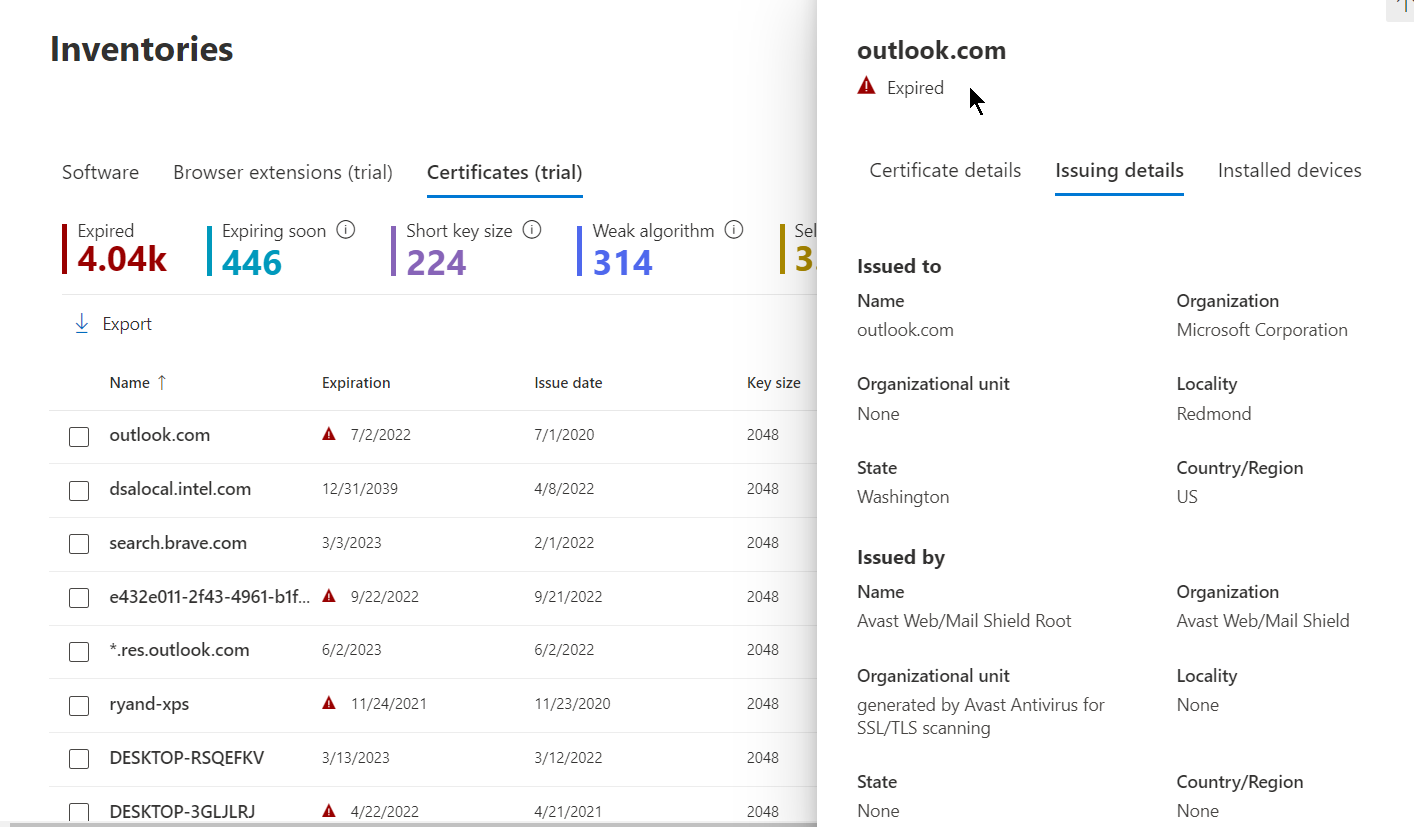
This information can help identify certificates that are expired or near expiration, detect vulnerabilities (weak signature algorithms, shore key sizes, and weak signature hash algorithms), and help validate compliance with regulatory guidelines or organization policy.
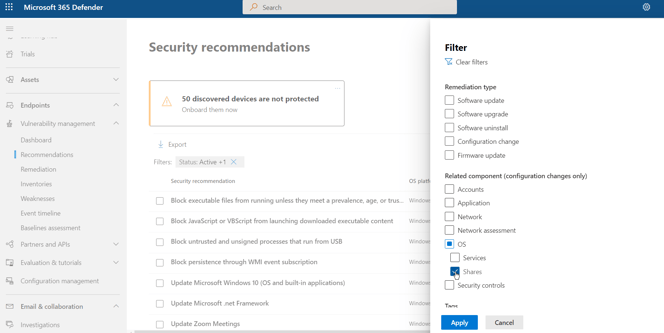
Let’s move on to network share analysis. Navigate to the MDVM “Recommendations” pane and filter on “OS/Shares.”
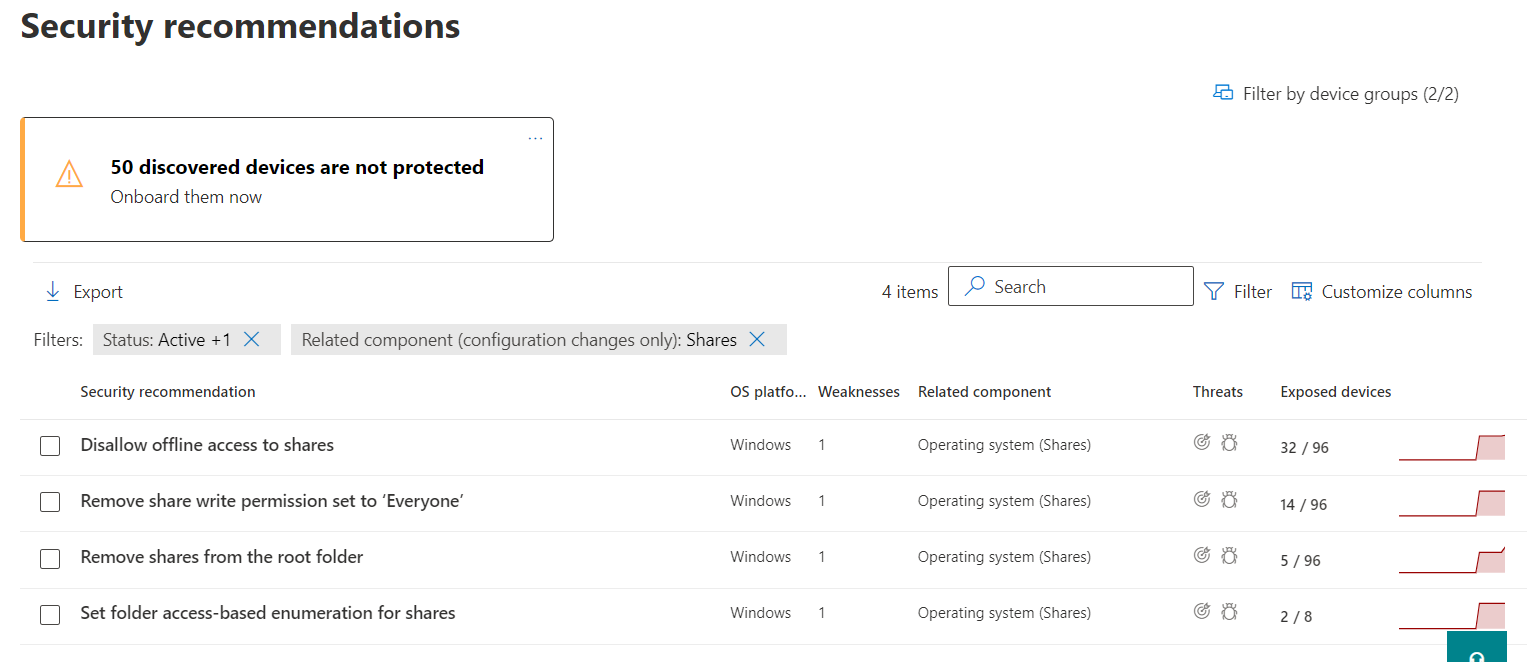
The resulting list will provide recommendations for vulnerabilities identified in the organization. Here we can see 4 recommendations and the associated exposed devices per recommendation.
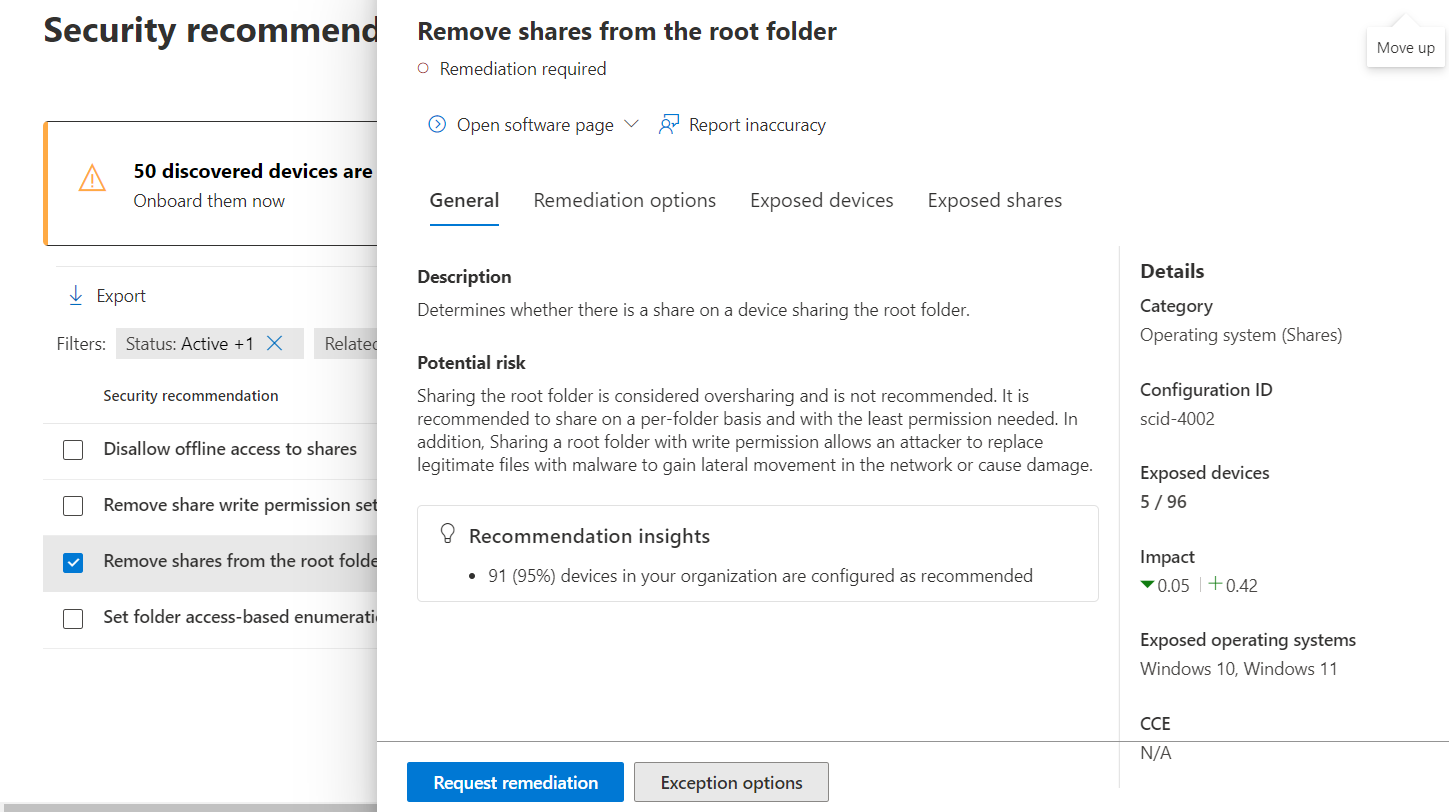
Select a recommendation to review the potential risk and investigate remediation options.
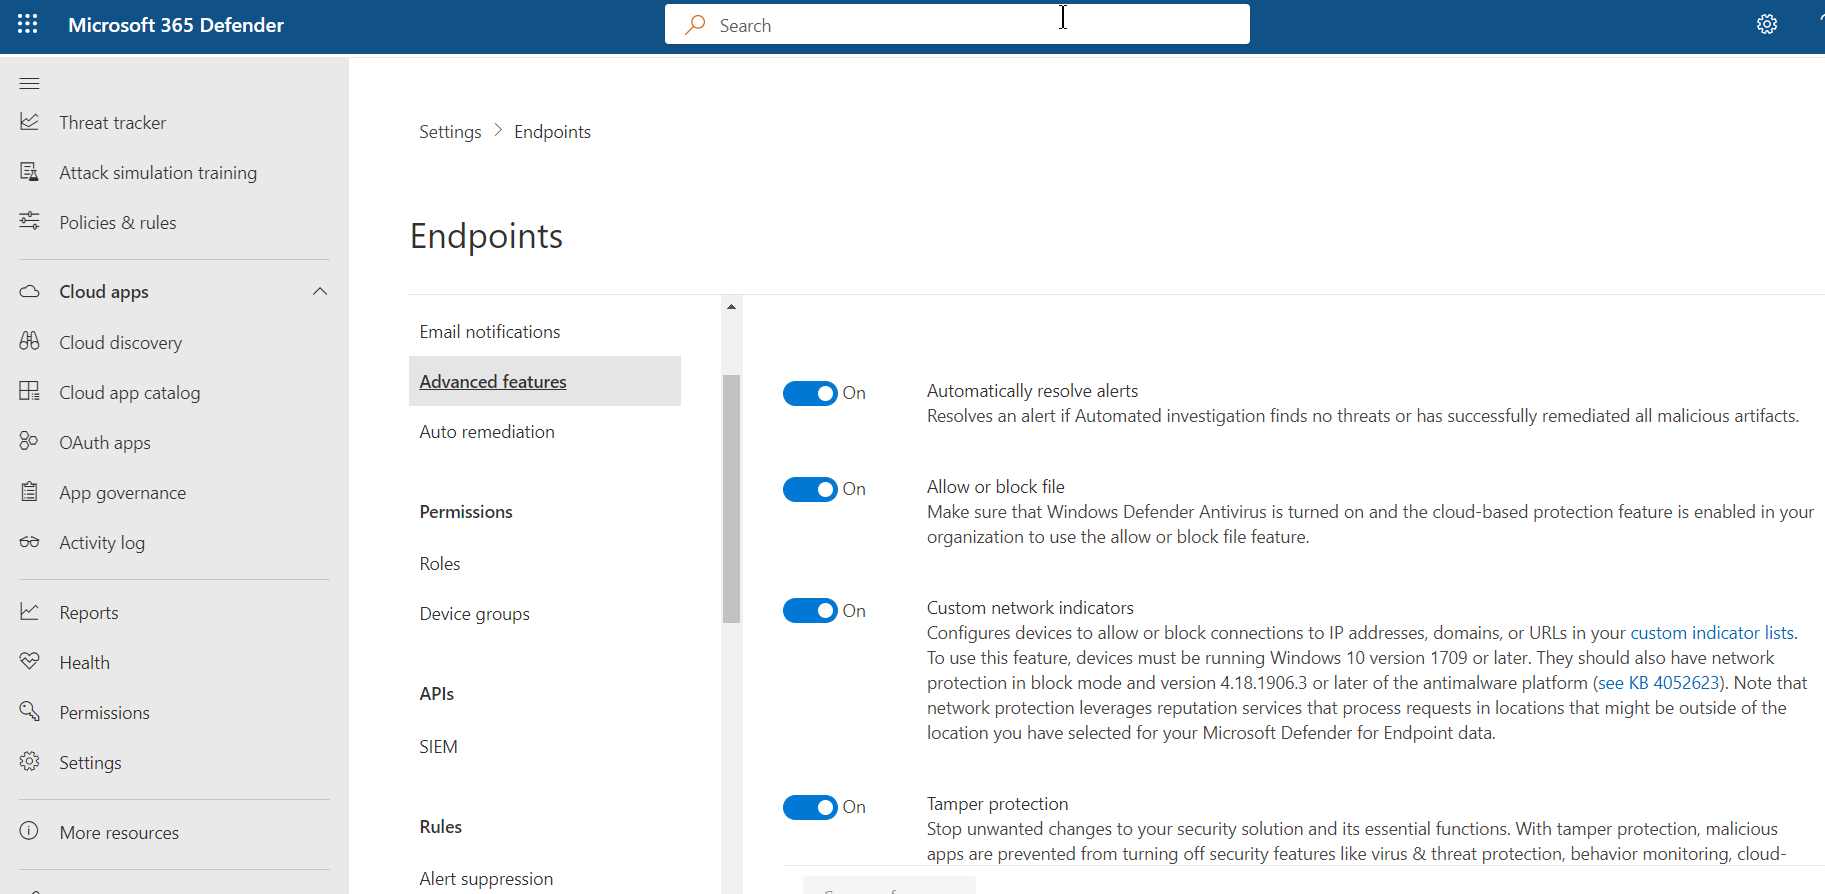
And last, but not least, we can block or warn on supported vulnerable applications. First, we need to ensure the advanced feature is enabled for Endpoints. In the security portal, navigate to “Settings” in the left-hand margin and choose “Endpoints” then “Advanced features.” Find “Allow or block file” and ensure it is toggled on.
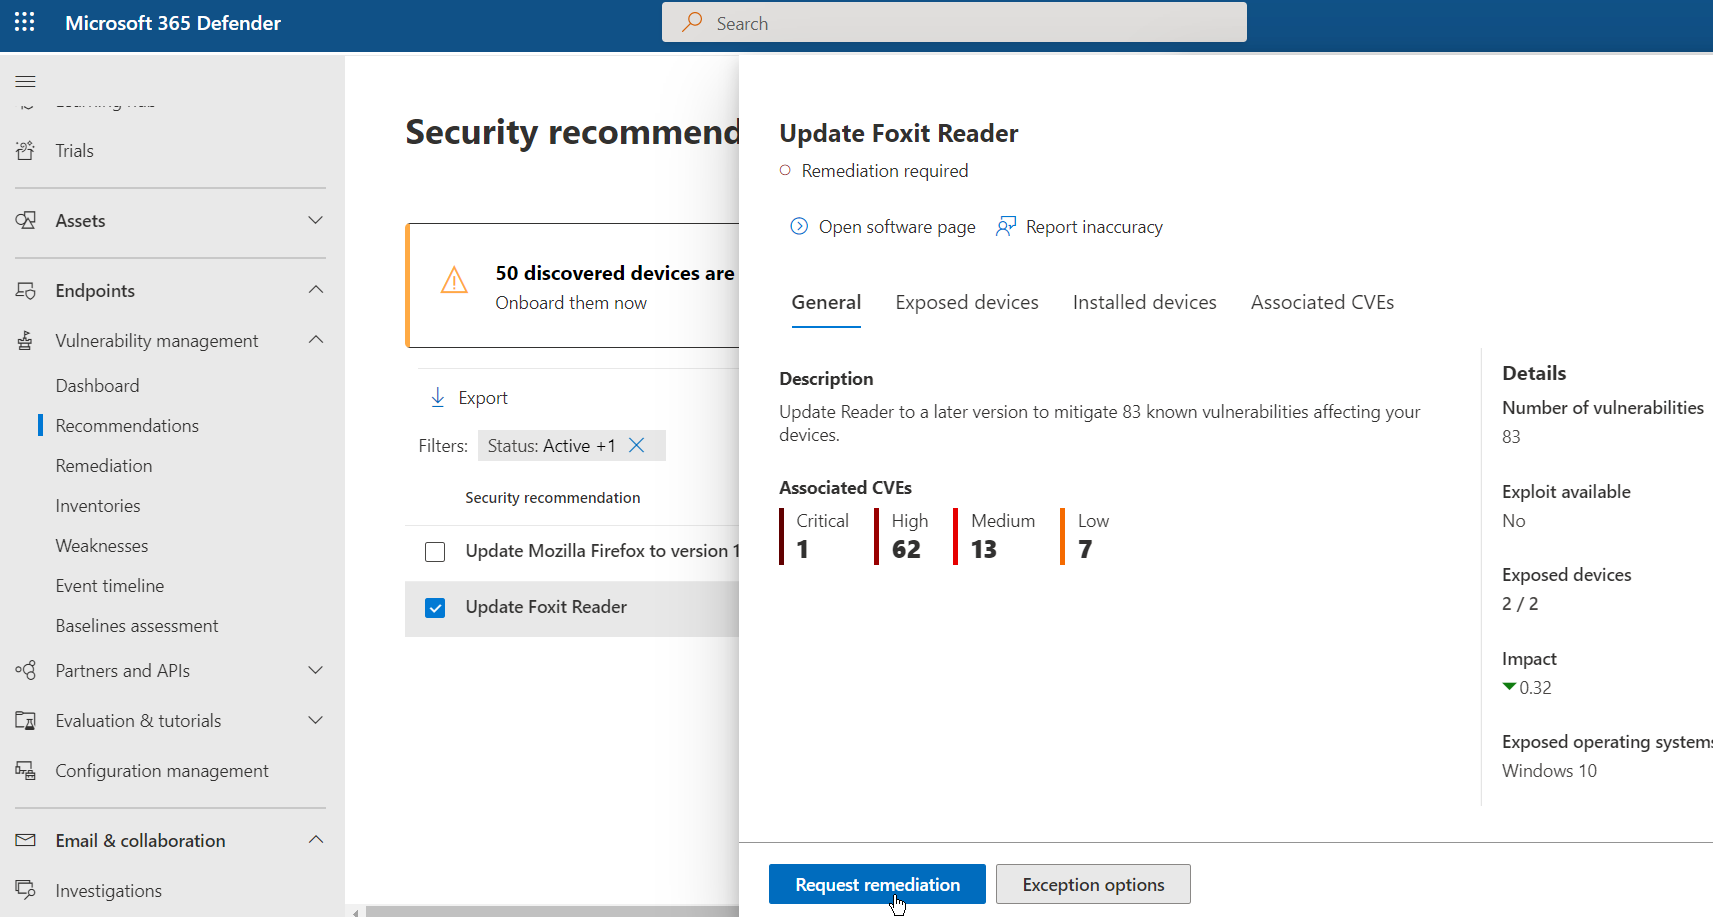
Now head back to the “Recommendations” pane under MDVM. Clear the filter set previously and then search for “Update” to find recommendations for updating software. In this example, we use Foxit Reader. Once you have identified your software that needs to be updated, select “Request remediation.”
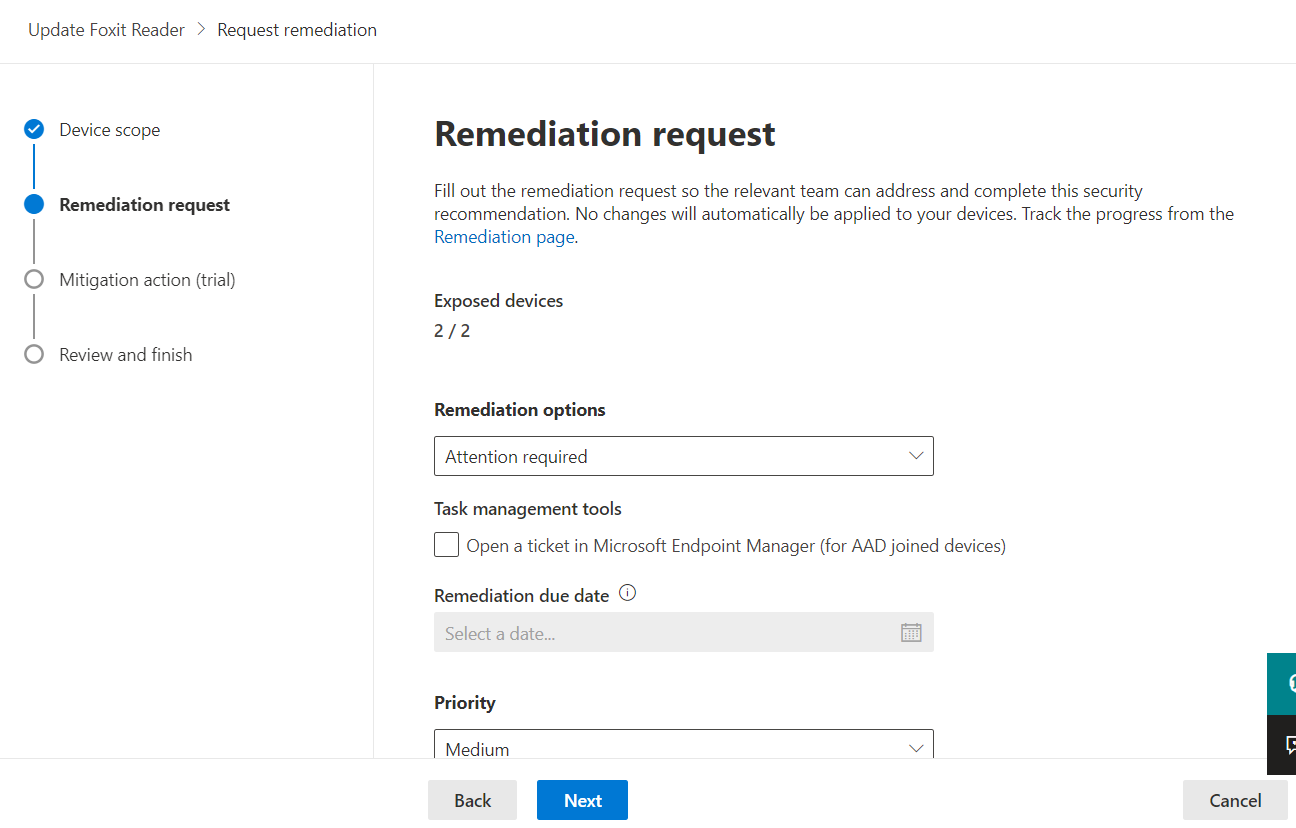
In the “Remediation options” dropdown, select “Attention required” and select “Next.”
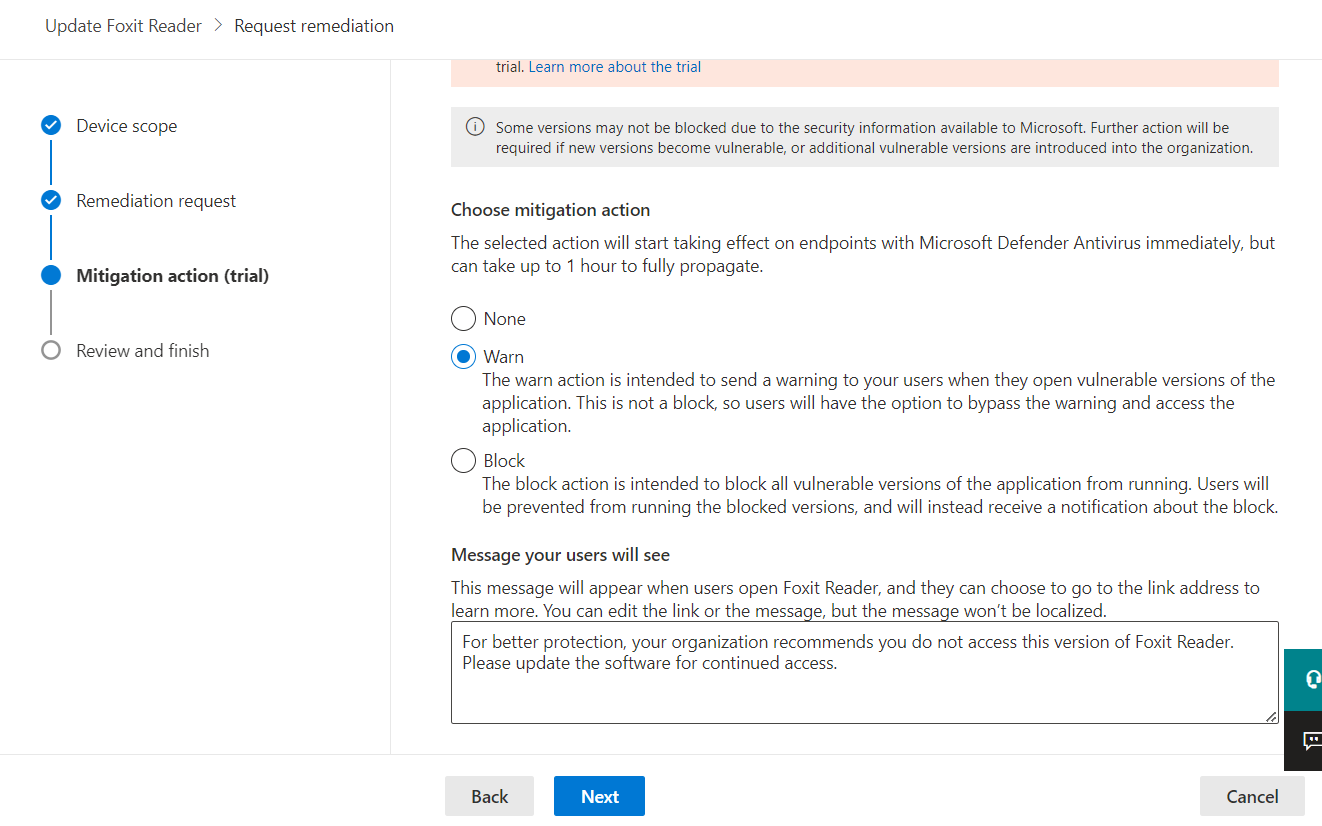
For the “Choose mitigation action” selection, choose to block or warn the end user. Here we will choose to warn for evaluation purposes. Adjust the message you want your end users to see, then select “Next” to review and complete the wizard.
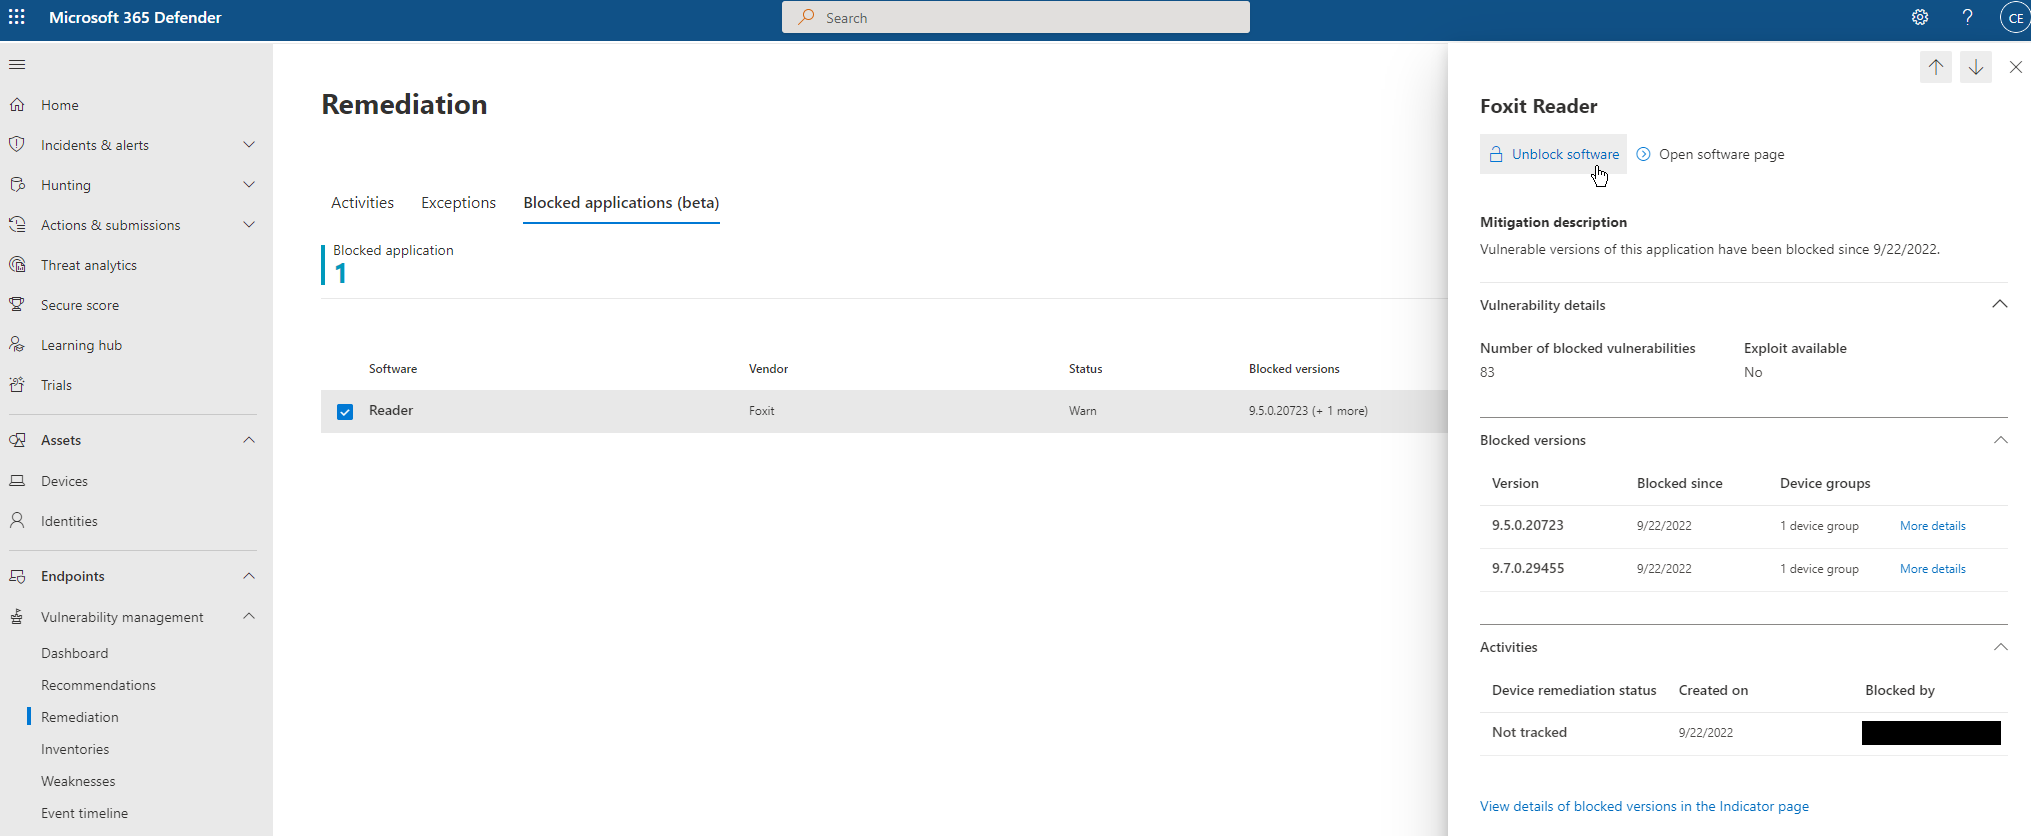
After completing the wizard, navigate to the MDVM “Remediations” page, then select an application to view details in the flyout for the blocked app. You can also unblock the app from the flyout on the right. Now, when users launch apps of these versions, they will receive the warning message provided.
That’s it! This concludes Part 2 of the series. I hope you have learned how MDVM can provide immediate value, regardless of your current licensing status. If you’d like to see more posts like this, subscribe to the KiZAN blog mailing list, or follow us on LinkedIn.
Demo | Workshop | Managed Service
Learn how Microsoft Defender Vulnerability Management can identify vulnerabilities and remediate weaknesses in your organization.

KiZAN is a Microsoft National Solutions Provider with numerous gold and silver Microsoft competencies, including gold data analytics. Our primary offices are located in Louisville, KY, and Cincinnati, OH, with additional sales offices located in Tennessee, Indiana, Michigan, Pennsylvania, Florida, North Carolina, South Carolina, Georgia and Texas.