
In today's fast-paced business landscape, staying ahead of the competition requires efficient and effective solutions. According to Microsoft’s Work Trend Index, nearly 70% of employee report that they don’t have sufficient time in the day to focus on “work”, with more time being spent Communicating than Creating.
Microsoft 365 Copilot is designed, with Microsoft’s cloud trust platform at its core, to allow for employees to both be more productive, reduce the time spent searching for information, performing mundane tasks, and other low-value activities.
Intro to DataFlows
DataFlows is one of the more exciting features added to Power BI of late. It allows anyone with experience in Power BI to create full ETL solutions through a few clicks rather than the traditional futzing around with SSIS, Stored Procedures, or any of the other multitudes of products and solutions out there.
Let's step through a common scenario using DataFlows, sourcing some data from SQL server:
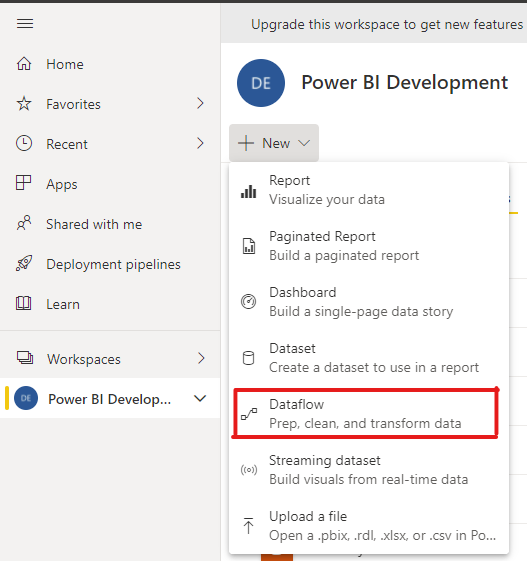
We start by navigating to a workspace, in my case “Power BI Development”. To create a new dataflow, click on the “+ New” button in the upper left corner:
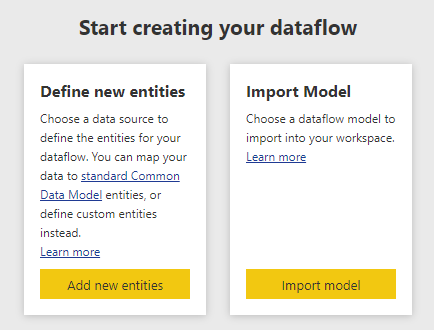
We then get a splash screen that lets us choose how we want to create the DataFlow, either by defining new entities or importing a model. For what we are doing today, we are going to select “Define new entities”:
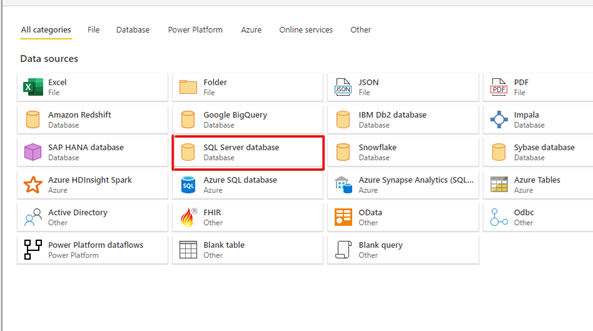
Once we have chosen to create new entities, we are brought to a screen showing all of the options for connecting to different data sources. This list is much the same as the connectors available in Power BI Desktop. Let’s continue with our example and select “SQL Server Database”:
Now that we have chosen to connect to SQL, we need to enter the server and database that we are connecting to:
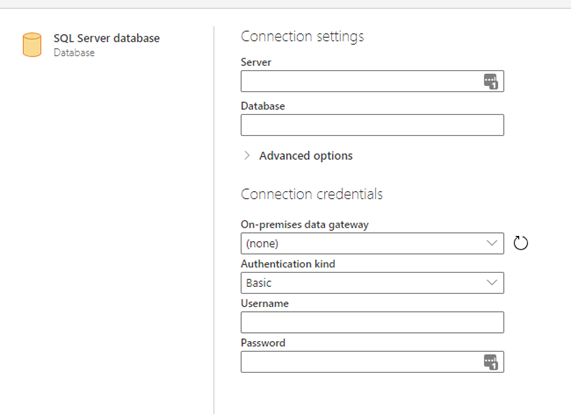
(Note, I’m using an Azure SQL server for this demo and won’t need a gateway connection created, if you are working with on-prem SQL servers either you or your gateway administrator will need to create a connection.)
Once our connection details are provided, and it has been able to connect to the server, we will see a list of tables/views in that DB just like in Power BI Desktop (are you noticing a running theme?):
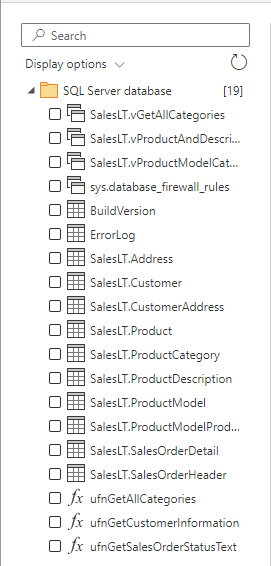
Select one or more from the list by clicking on the checkboxes:
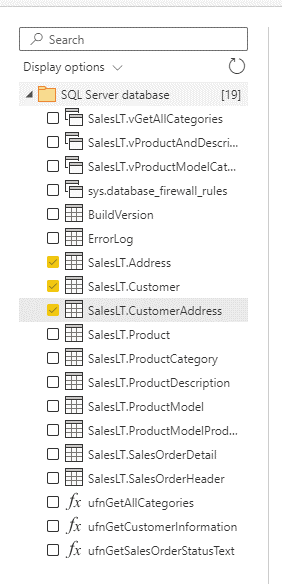
Once you have selected all of the tables that you need, click on the “Transform Data” button in the bottom right corner:

This is where you can do any transformations that you need. This is largely the same as the Power BI desktop interface with only a couple of minor differences:

Once you have done all of the transformations that you need click the “Save & Close” button in the bottom right corner:
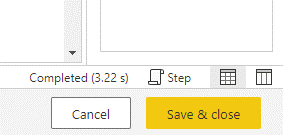
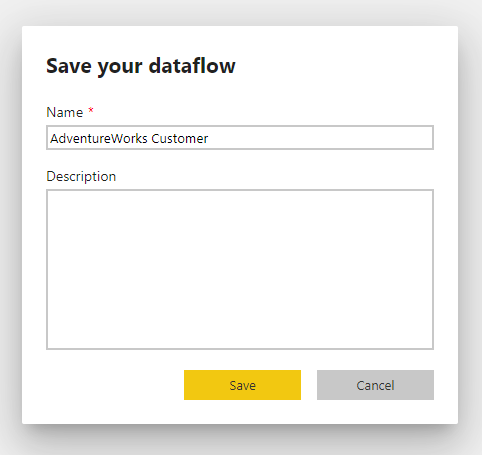
Power BI will then go through a query validation process and once that is complete, it will prompt you to give your dataflow a name and description:
Lastly, there is going to be a notification that pops up in the upper right corner of the page prompting you to refresh the DataFlow. Hit “Refresh Now” to load your data:
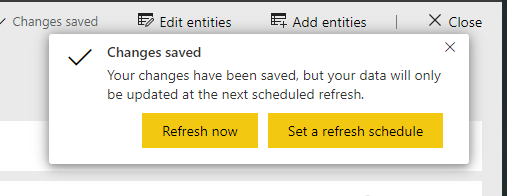
Congratulations! You have created a DataFlow. Let's use this as a source in a desktop file to tie this blog together.
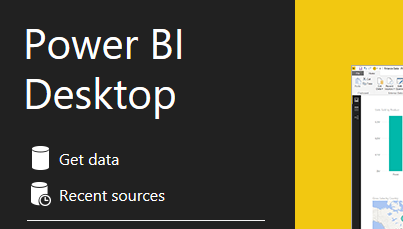
First up, lets open power bi desktop, and select get data:
From here, select “Power Platform” in the sidebar and then “Power BI DataFlows” from the list of sources:
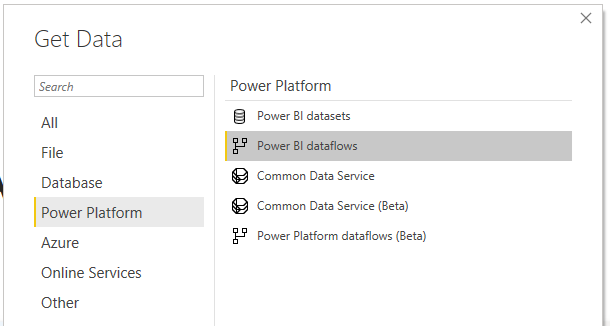
Now, we click connect in the bottom right of the window. It will then connect to the Power BI Service and prompt you to log in. Just follow the prompts to log into your work email address:
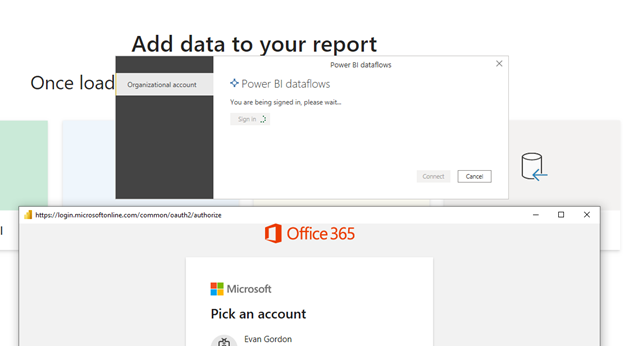
(if you have used DataFlows in the past your credentials will be cashed and this step isn’t necessary)
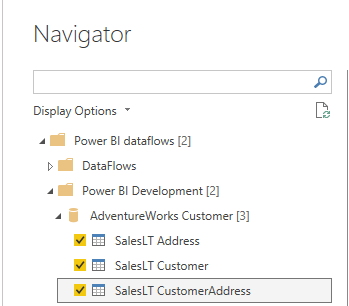
You will then be greeted with a list of workspaces with DataFlows in them. Select the workspace that you created the dataflow in, the DataFlow, and then the tables that you want to import:
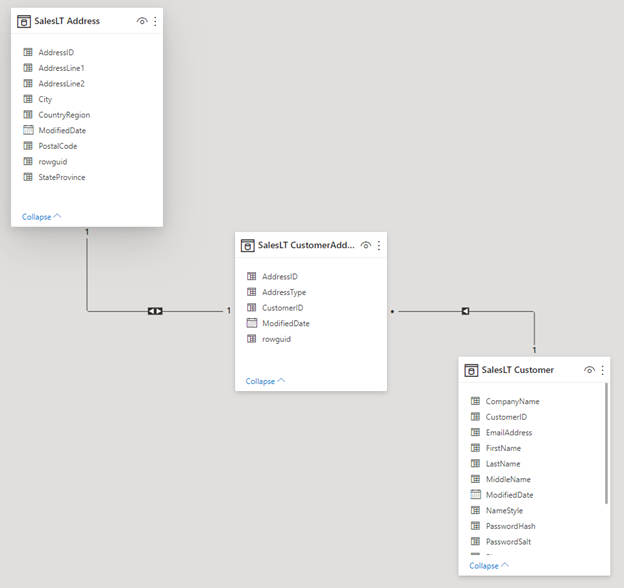
Here is a look at my data in the model view after import:
One more important thing to note, since DataFlows uses the same query language as Power BI Desktop, we can also just copy-paste existing queries from PBIX files. This is an easy way to make tables that were previously only in one file available to others on your team or to multiple datasets.
With that, you have gone from 0 to DataFlow! Now, you can reuse these tables in multiple files, have a single place to update logic instead of having to change all of the files using them individually, and can share these tables with others making reports more consistent. If you are still hungry for more getting started advice, may I recommend Brady’s Getting Started with Power BI Series or if you want to see some art of the possible with sourcing data in Power BI, check out Jimmy’s How to scrape and analyze website data with Power BI.
KiZAN is a Microsoft National Solutions Provider with numerous gold and silver Microsoft competencies, including gold security and gold enterprise mobility management. Our primary offices are located in Louisville, KY, and Cincinnati, OH, with additional sales offices located in Tennessee, Indiana, Michigan, Pennsylvania, Florida, North Carolina, South Carolina, and Georgia.

