

In today's fast-paced business landscape, staying ahead of the competition requires efficient and effective solutions. According to Microsoft’s Work Trend Index, nearly 70% of employee report that they don’t have sufficient time in the day to focus on “work”, with more time being spent Communicating than Creating.
Microsoft 365 Copilot is designed, with Microsoft’s cloud trust platform at its core, to allow for employees to both be more productive, reduce the time spent searching for information, performing mundane tasks, and other low-value activities.
There are many options for deploying applications within Intune. Except for a few Windows Store applications, most deployments should be Win32. Microsoft offers the MSI Line-of-Business deployment, but it should be noted that these apps will cause issues during Autopilot, and may not honor long, complicated installation strings. For this reason, KiZAN recommends packaging all applications as Win32, even if they are MSI files.
Concepts
For anyone who has packaged software as an application or package in SCCM, the concept is much the same. If you have not, this section will cover some basics.
Intune Win App Util
All Win32 applications must be “wrapped”. For tools like SCCM where things are local, we can point to a directory of files. Intune is cloud-based and wrapping the files into an Intunewin file helps avoid confusion or problems with uploading. Additionally, files like MSIs can provide the App Util some extra information, making the process easier for admins. The tool can be found here, GitHub - microsoft/Microsoft-Win32-Content-Prep-Tool: A tool to wrap Win32 App and then it can be uploaded to Intune, and you should download a new copy if this is your first time, or you have not packaged recently. Microsoft regularly updates the tool with bug fixes and new functionality.
The tool is run from command line and offers parameters that would allow you the opportunity to package in bulk, but for this document we will be running with prompts.
Prepare a Win32 app to be uploaded to Microsoft Intune | Microsoft Docs
Packaging
- Packaging and deploying apps vary between tools, but the core concepts are usually similar. Our goal is to install software/files/settings onto a workstation or server.
- Intune looks first for source files. We must provide a source folder containing all configuration files, scripts, MSI, EXE, and anything else needed to silently install our software.
- Intune will then ask us for the installation file. The script or MSI or EXE that should run and facilitate installation. If installing an MSI, the Intune prep tool will extract information from the file, making our job easier.
- Intune exports an Intunewin file that will be uploaded to the console.
- When we upload the file, our job is not finished. Intune still needs key information. We must tell it what command to run, so that our software installs silent without interaction.
- Intune also needs to know what file or folder or setting to look for, so we can verify the app is installed. This is helpful for deploying to existing devices. If Intune detects this file or setting, it will not try to reinstall software.
Step-by-Step
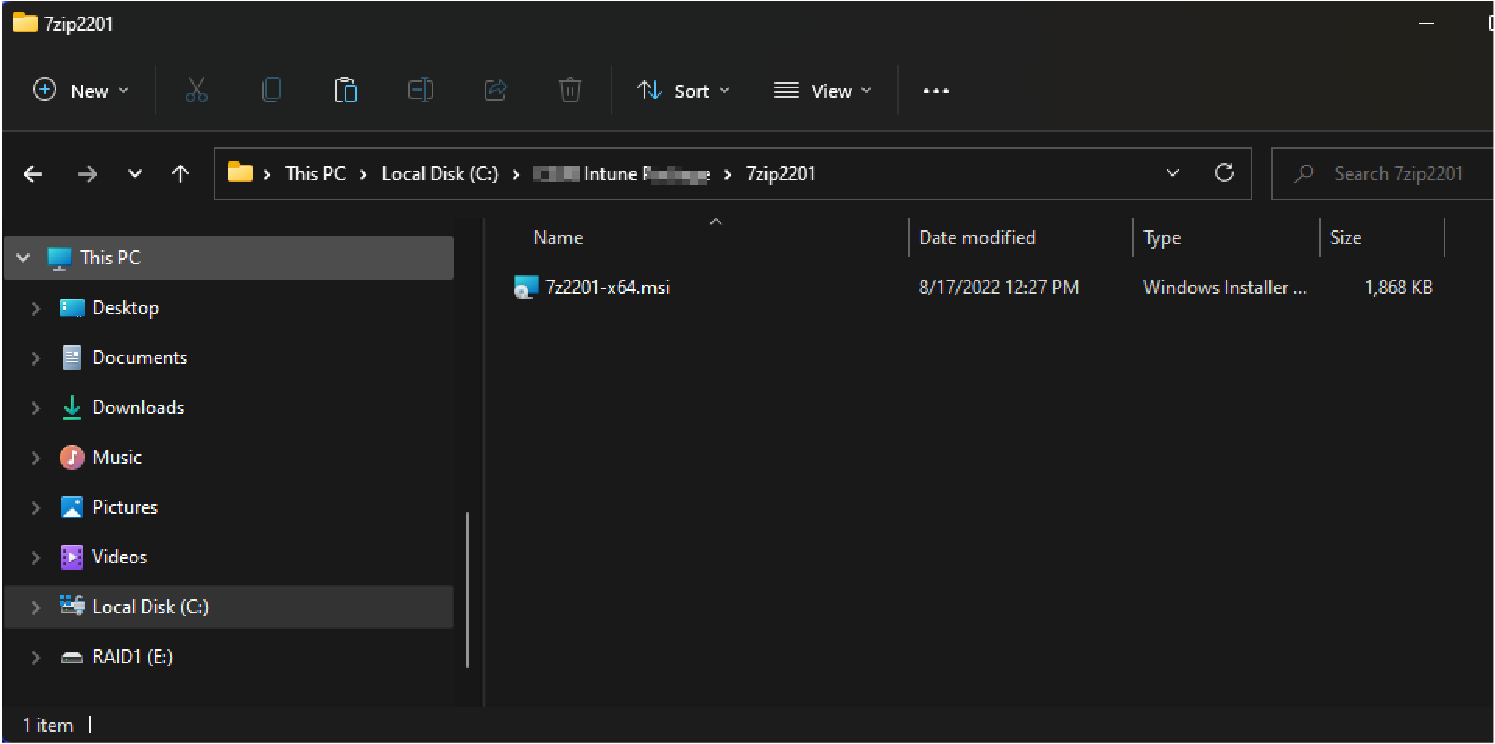
- Locate software to be packaged from vendor or software company. Place it in a unique directory with any other supplemental files. It may be a good idea to build a folder structure for source files, segmented by software and version. If you are familiar with Configuration Manager, this may already be created. Software or files not directly related to the application being deployed should not be included in the source directory, this will bloat the Intunewin file.
- Download the Win32 Content Prep Tool if you have not already. Right click and run as administrator. Optionally, you can open a command prompt as administrator and run the application that way.
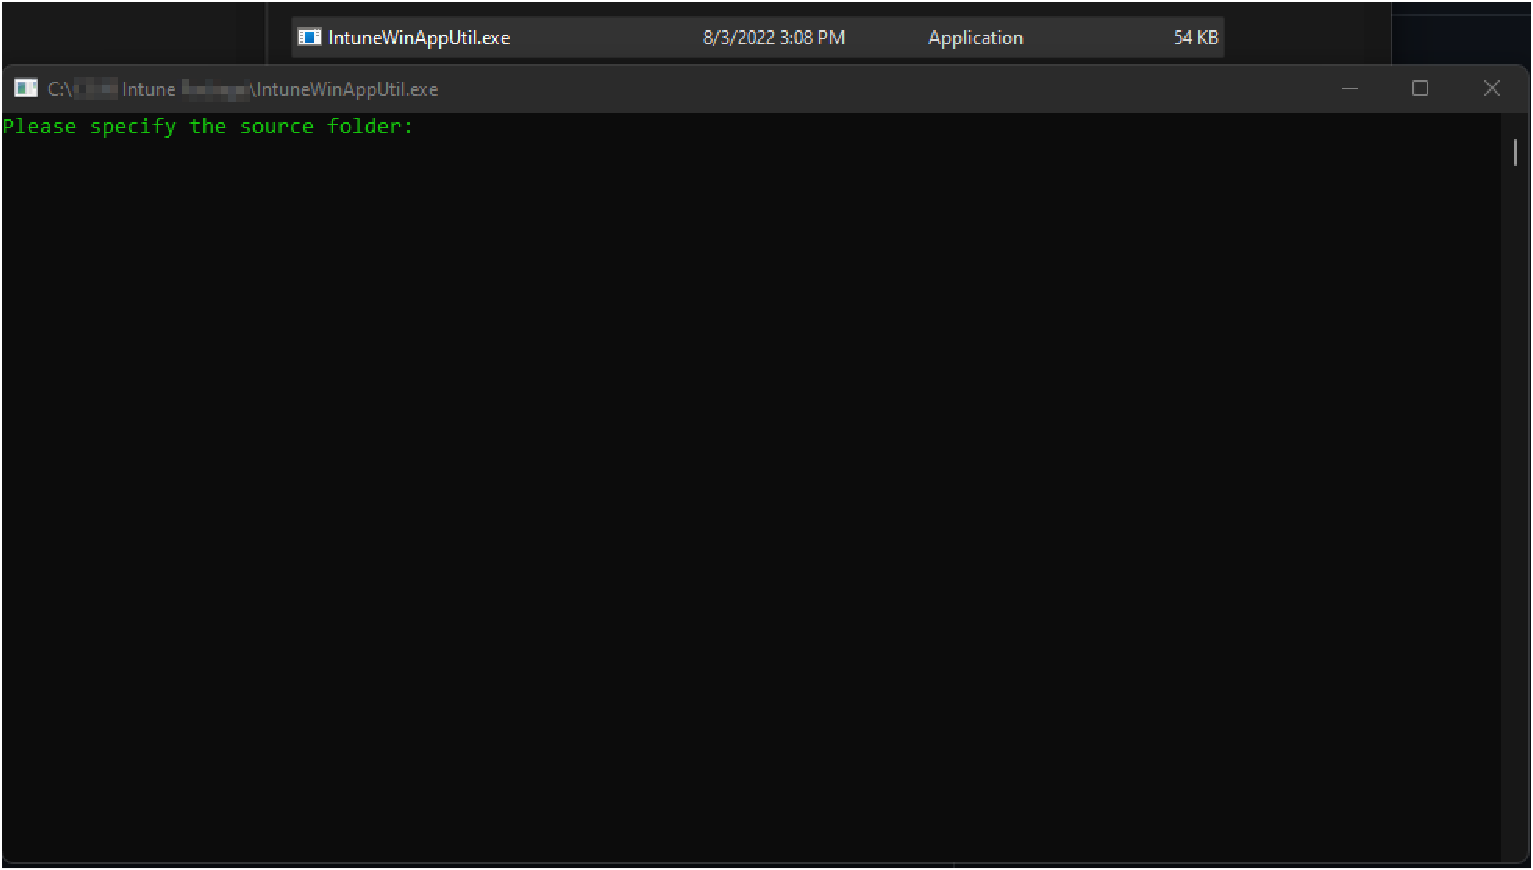
- Specify the source folder containing our application and associated content. (If you hold Shift + Right Click on a folder or file, you can select Copy as Path). The wrapper tool will collect all data in the source folder and maintain that file/folder structure. Do not point at a large directory. The tool will attempt to wrap everything. (Example would be pointing at your Downloads folder, typically we recommend making a folder for each version of each application.)
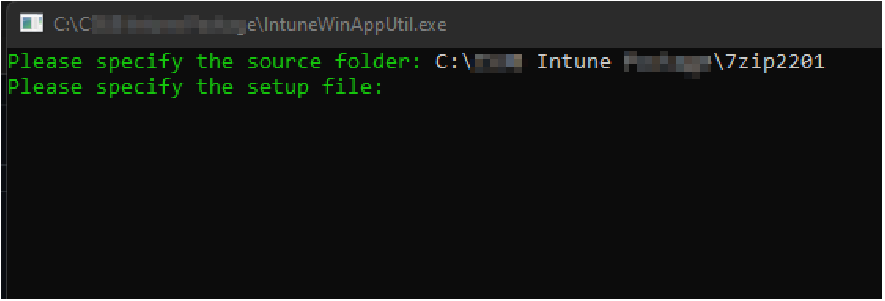
- Up next is our setup file. The name of the primary installation file. In our guide here, you’ll select the full name of the MSI. If you’re using a batch file or PowerShell script to install additional configurations, you could point to the core MSI if you like, but you’ll have to manually adjust the install string later.
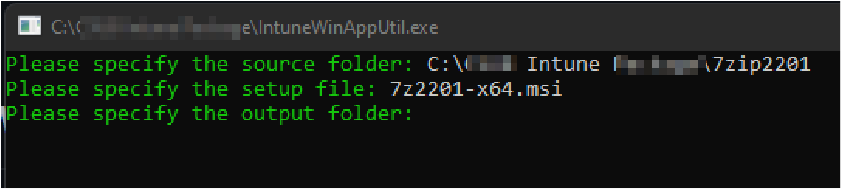
- The output folder is where the finished package will be exported. Do not specify your source folder. It is best to create a separate location for Intunewin files.
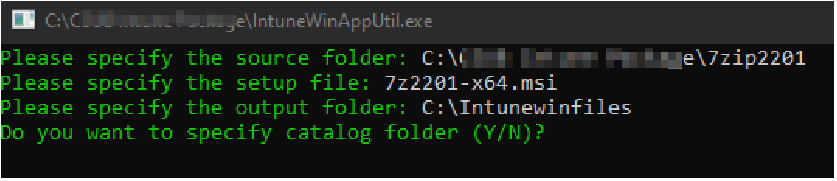
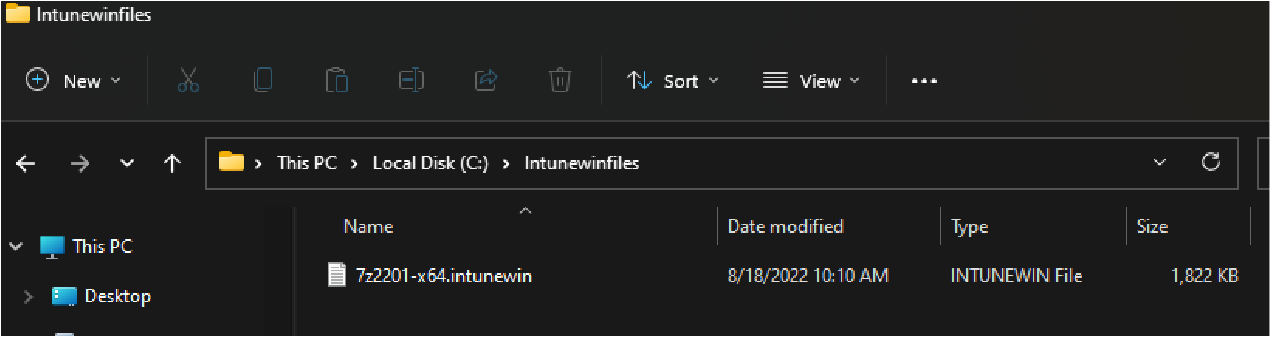
- Do not specify a catalog folder. If you opened the tool directly, without using CMD, it will automatically close, and you output folder will contain an Intunewin file.
- Open your browser and navigate to Microsoft Endpoint Manager admin center.
Select Apps > By Platform > Windows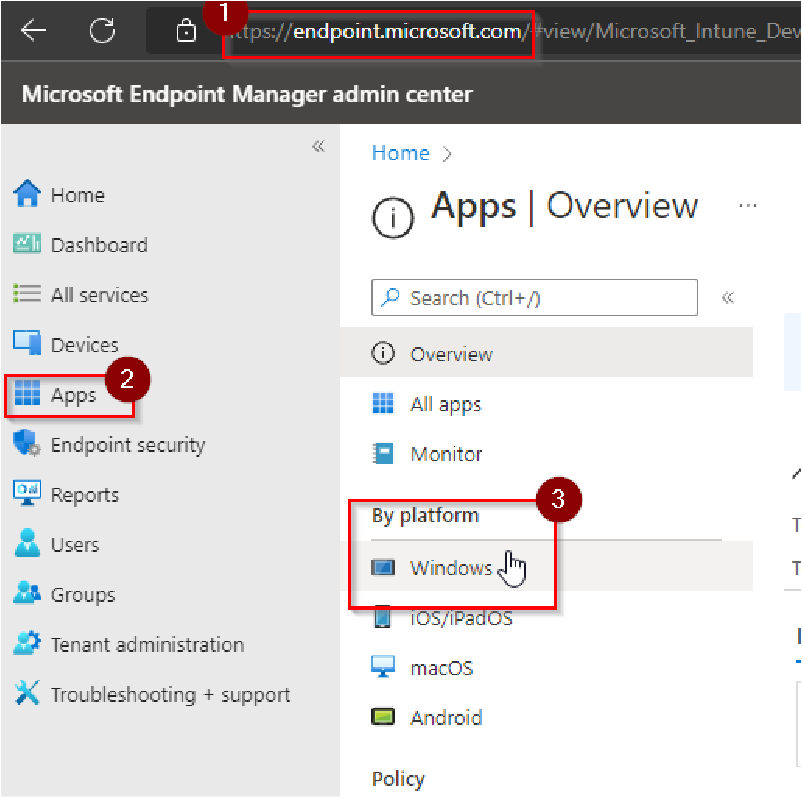
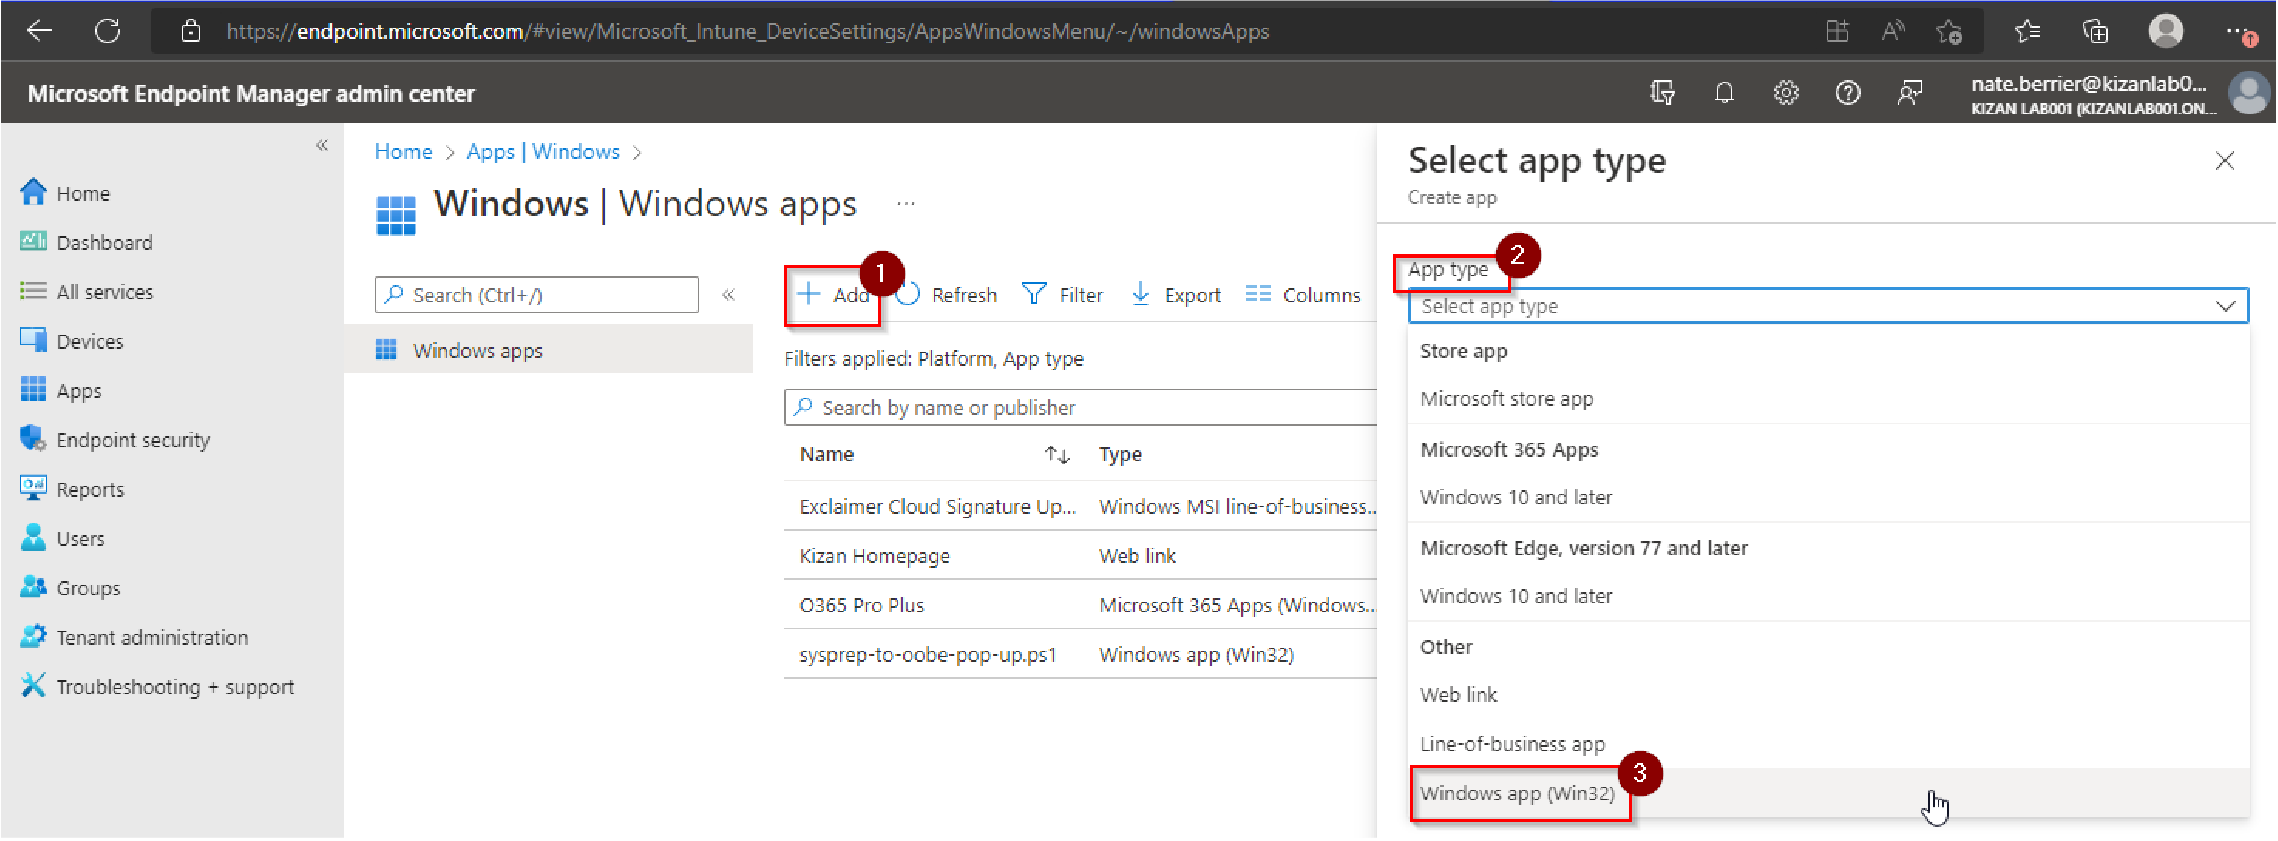
- Select Add > App Type > Windows App (Win32)
- Upload your newly created Intunewin file.
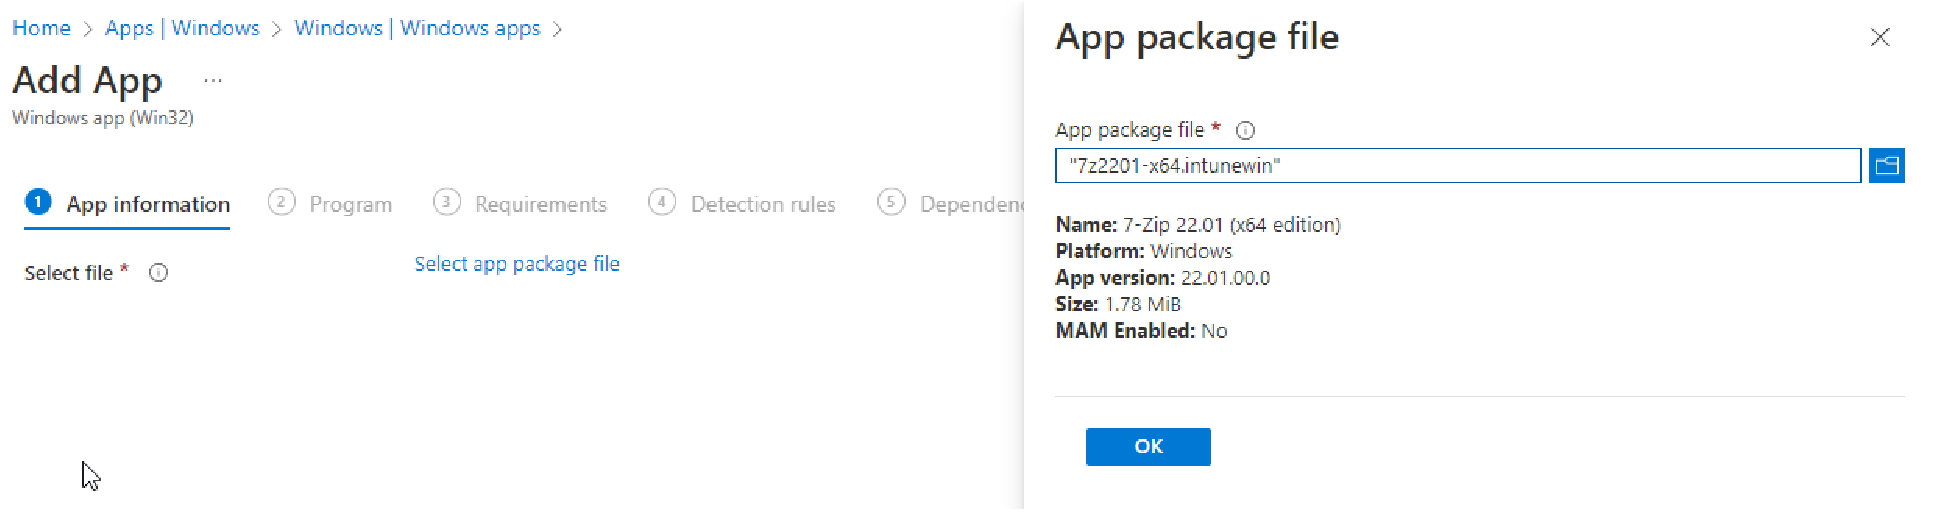
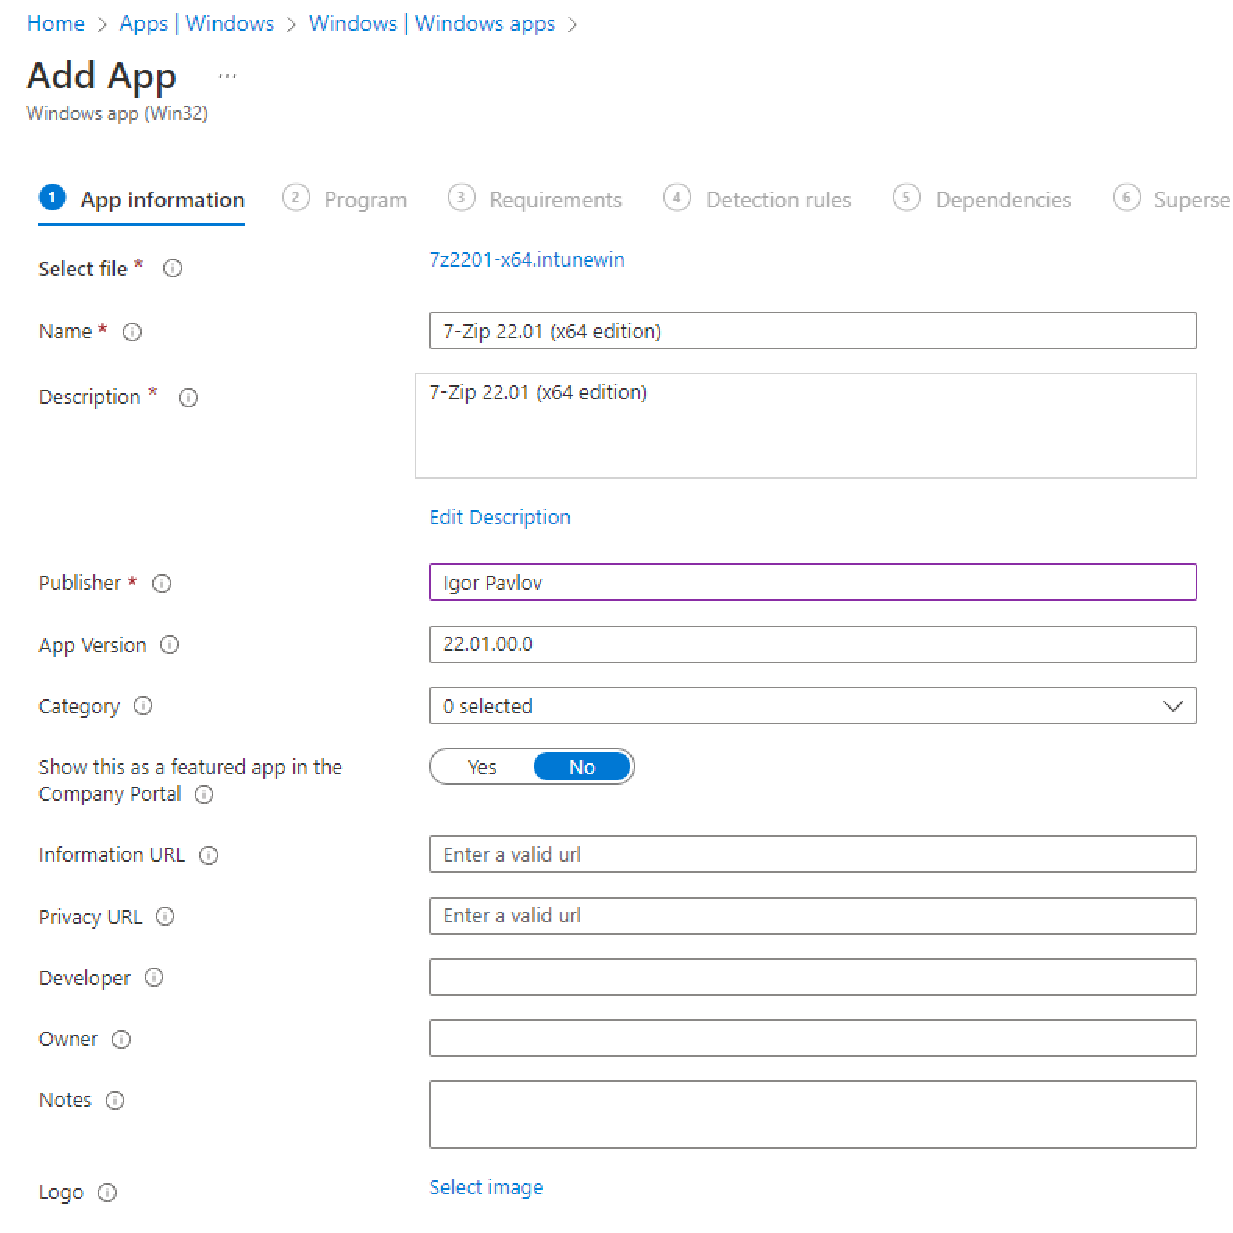
- On the next screen, you will configure App info. This portion is primarily necessary when deploying applications as available in the Company Portal. This information will be shown to the end user. If you uploaded an MSI, you’ll notice that some information is pre-populated for us! The description section is a rich text editor and allows for text sizing and styling. A logo can be uploaded for a better experience too!
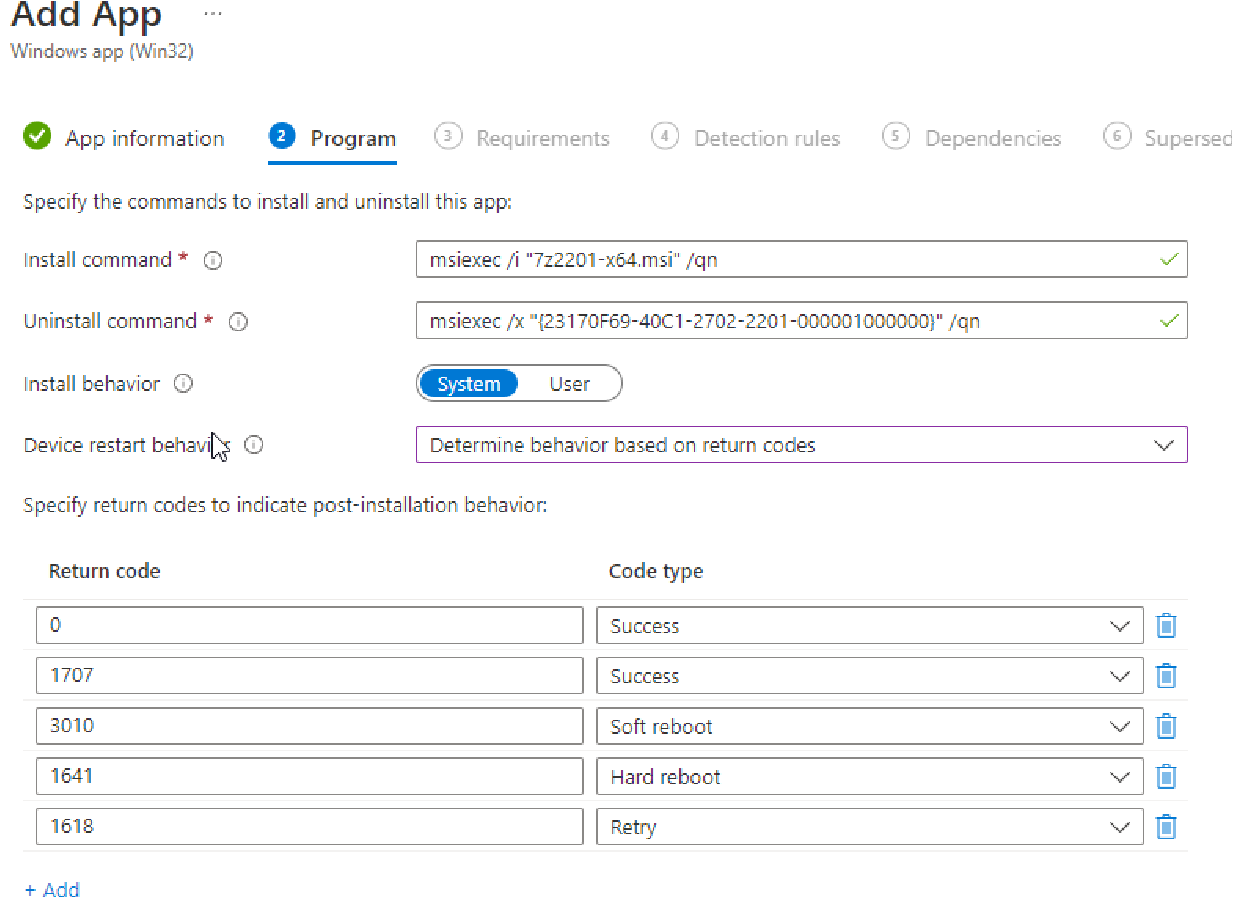
- Advance to the next screen, and you’ll see Program settings. Here we can specify install and uninstall commands. If you don’t have an uninstall string, you can enter “cmd /c”. Apps must typically be installed as system unless users are local administrator. Changing Device Restart Behavior to Determine behavior based on return codes can be helpful. This allows Intune to prompt for pending restart or notify of failure based on app behavior. No need to change the return code map unless your app behaves oddly.
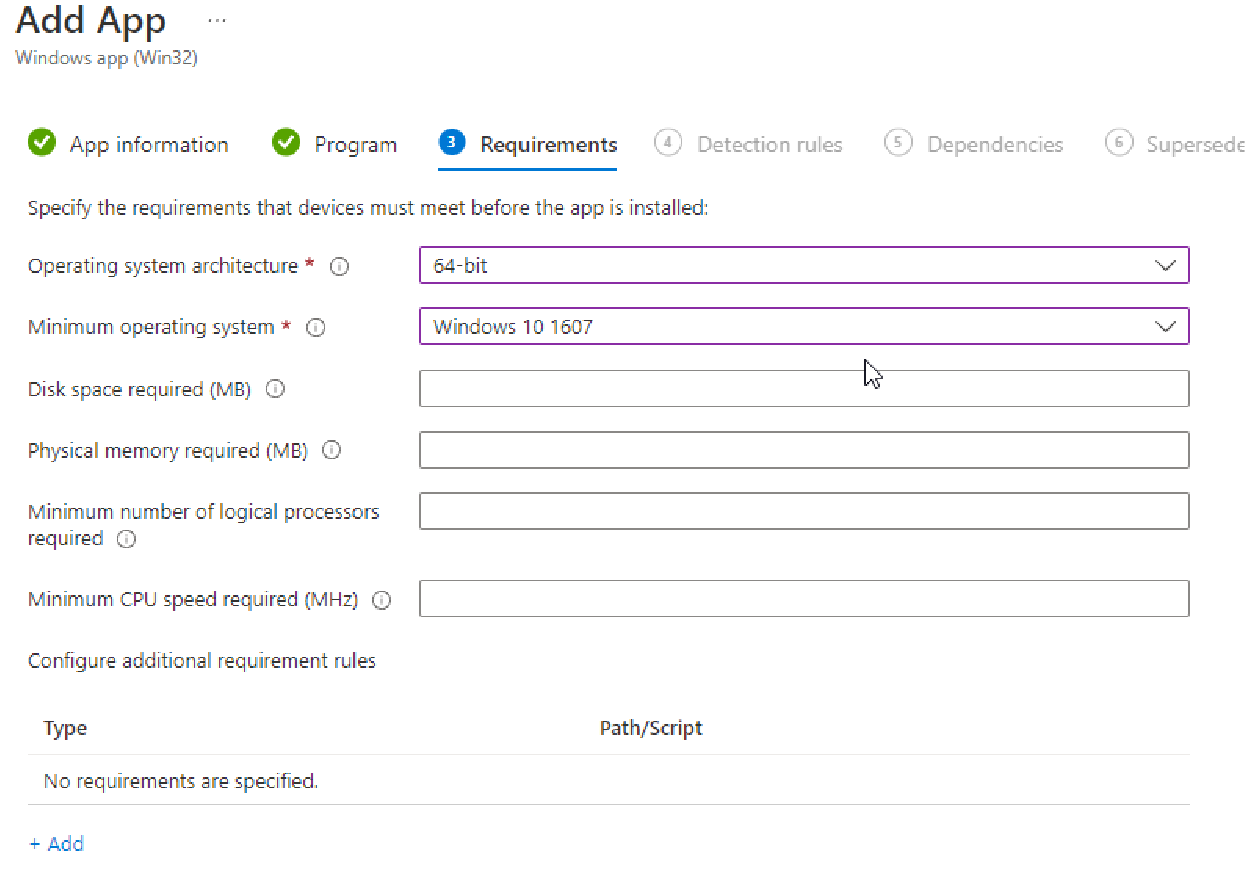
- Advancing to Requirements, OS architecture and minimum OS must be filled out. Typically selecting the minimum version of Windows 10 is acceptable. Most apps run on any version of Windows 10. OS architecture for most Windows 10 devices is 64-bit, but feel free to select both if you know the app can run on either. Additional requirements can be specified if you have unique needs (only run if xyz registry key is present or a custom script returns xyz value)
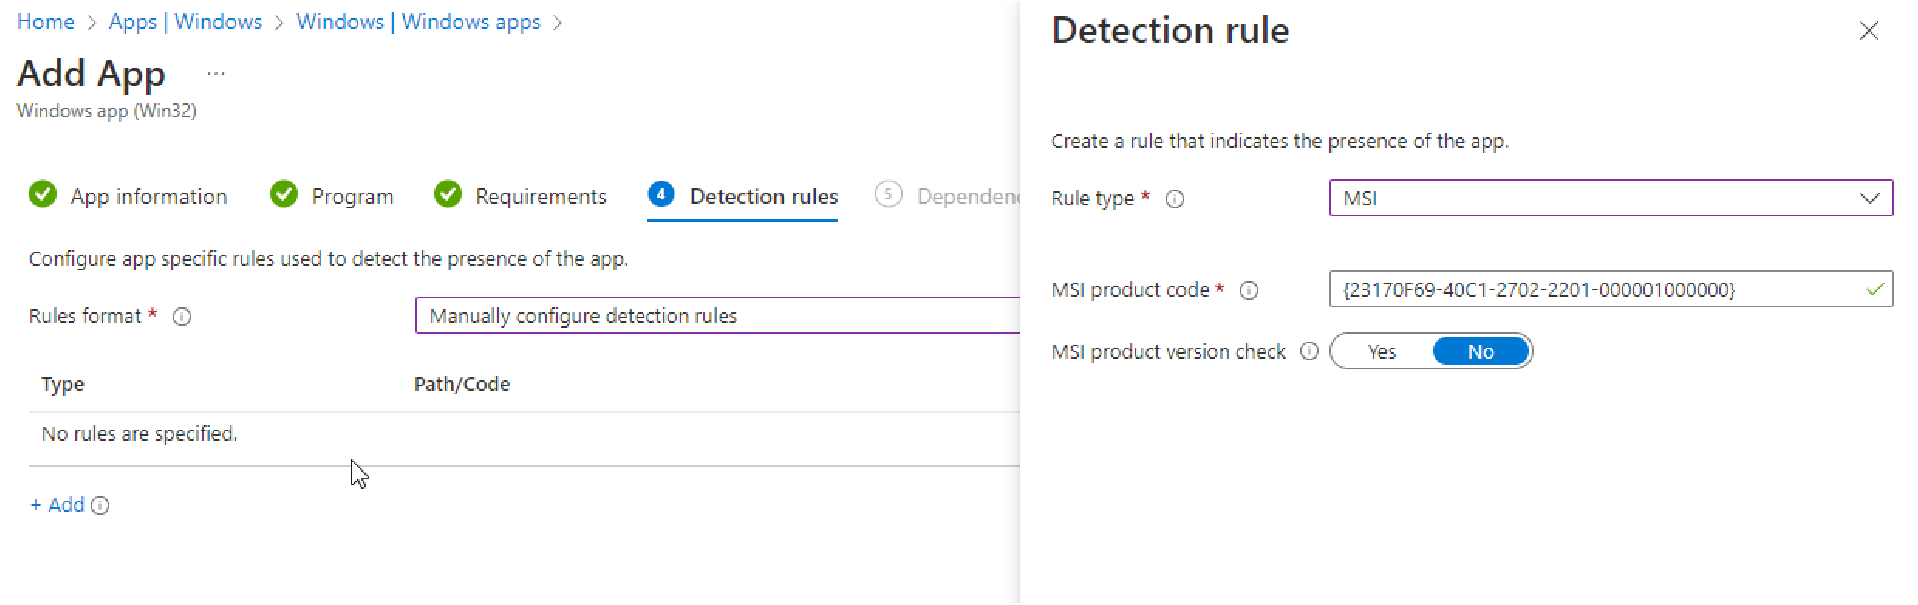
- Next up, we must specify some detection rules. Intune is a bit smarter than you might have imagined. Detection Rules look for a positive identifier of installation, and do not simply rely on a success exit code. This prevents the app from being installed if it already exists and gives a better indicator that it actually installed when completed. If you wrapped an MSI, some of the work is done for us, otherwise you may need to reference a test computer for File/Folder/Registry or other indicator of installation. A script can also be used, but for this app, we’ll select Manually configure detection rules > select Add > select MSI for Rule Type.
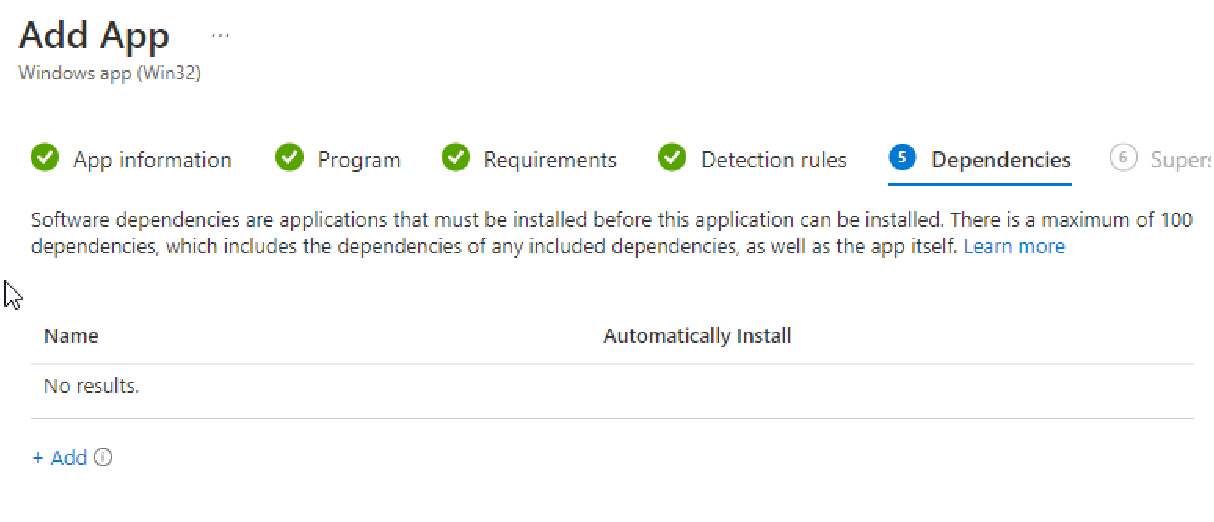
- Our test application has no Dependencies, but if you needed another app to install first, you could specify it here. (Imagine needing dot Net or C++ for an app to run correctly.)
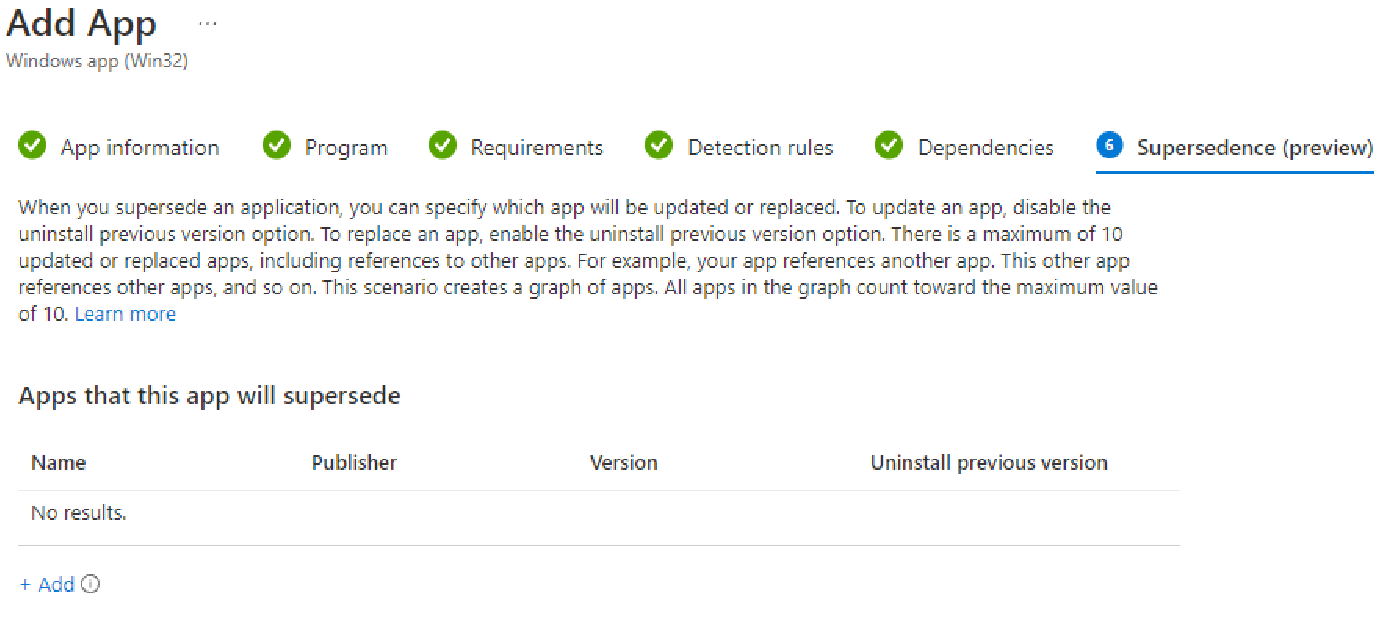
- We won’t be touching Supersedence either, but this tool allows you to update old apps to a newer version.
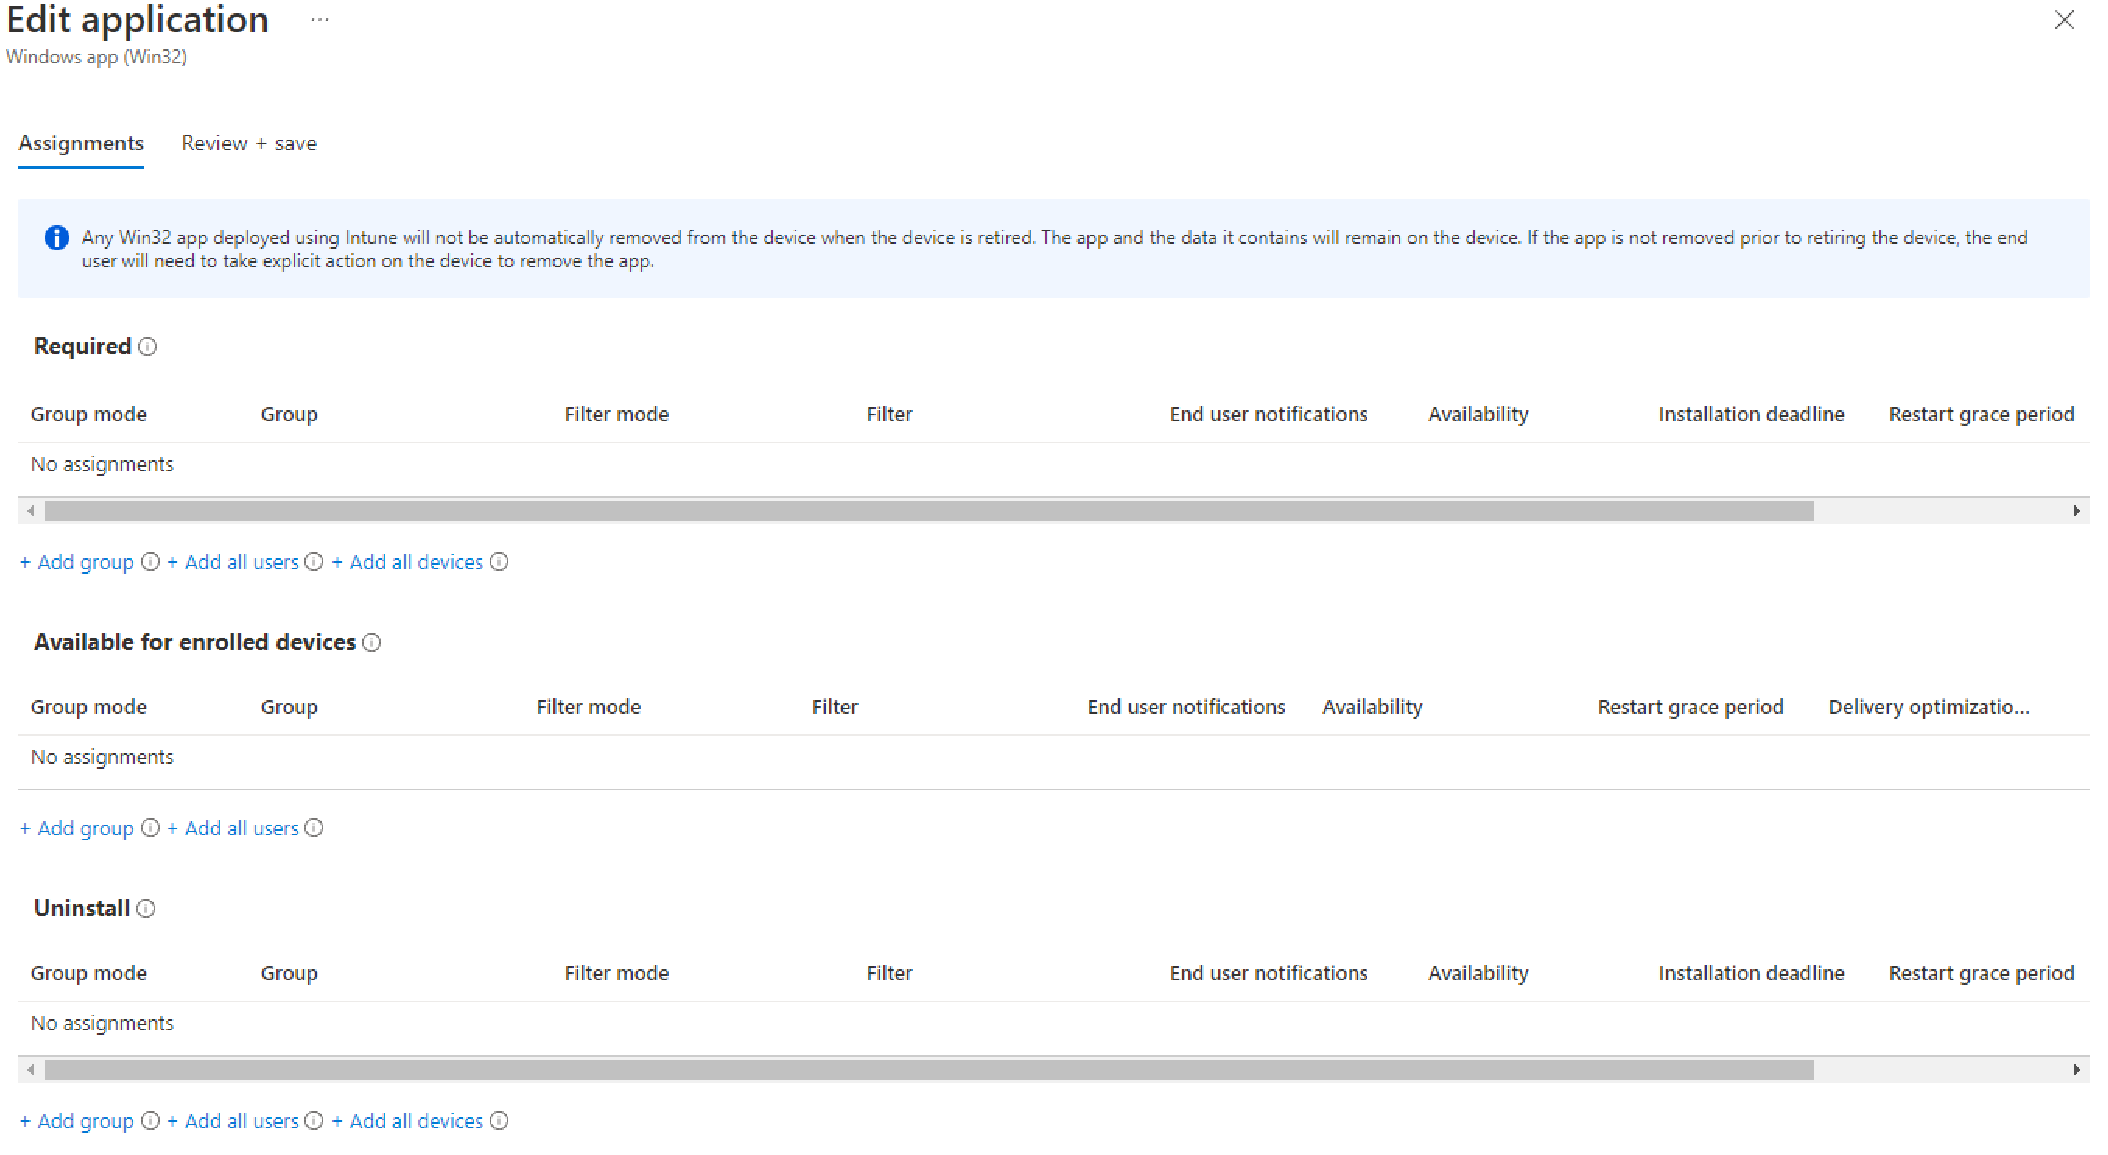
- Finally, onto assignments. Apps can be deployed as Required, Available, or Uninstall. If deployed as Required, the app will silently install when scheduled, or the device checks in. You can adjust the settings when you choose a group. Available deployments allow the user to install on their own time from the Company Portal app.
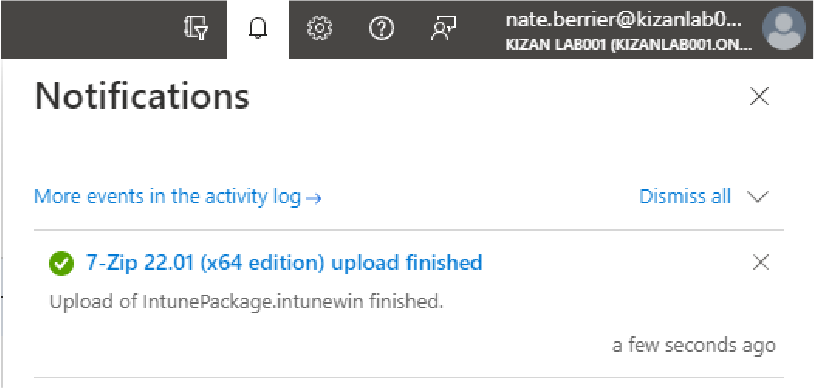
- After you review and create the app, do not close the browser. The Intunewin file is not uploaded until you finish. If it’s a large file, this will take a while. You can check under the bell for status

As a Microsoft Gold Partner with 30 years experience helping organizations achieve their IT business goals, we offer unrivaled expertise and innovation in Microsoft technologies.